Expanding Pinning to shortlist View
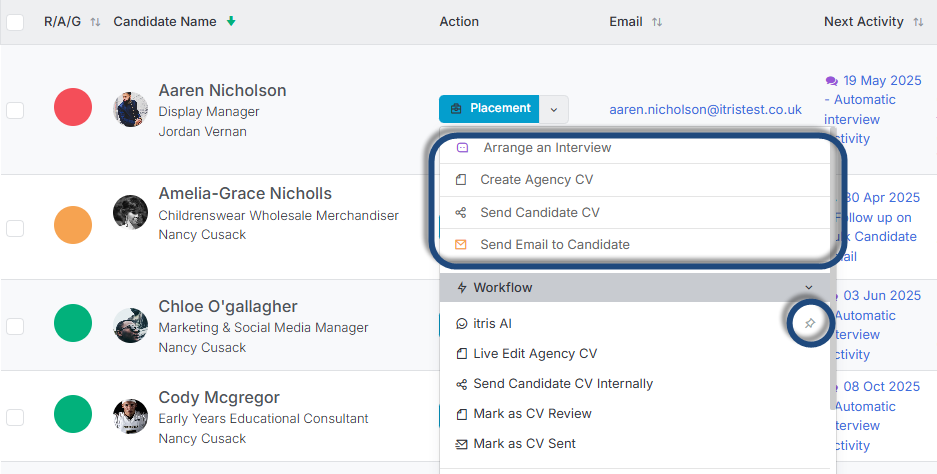
The ability to pin shortlisted placements is now available in List View, giving you the same powerful pinning experience whether you prefer card or list layout.
Pins are shared across both views, so your pinned placements stay consistent no matter how you switch between them - no duplication, no extra setup.
Bulk Update Published and Date Published Job Fields
We’ve added two new Bulk Update options in Job Record Views. You can now bulk update “Publish on My Website” and the “Job Publish” date, no more opening records individually to achieve this.
Publish on My Website
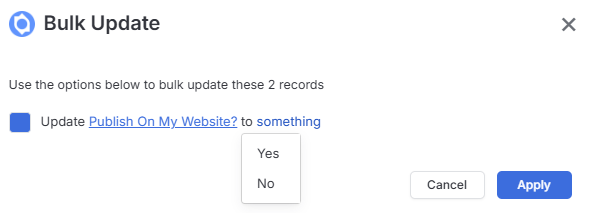
If you’re activating a batch of new roles or taking jobs offline at the end of a campaign, you can now flip the website publish flag across multiple records in one action.
To use it, select your Job records from the Jobs list, click Action > Bulk Update, and choose “Publish on My Website?” from the field dropdown. Select Yes or No, tick the confirm checkbox, and click Apply.
Job Publish Date
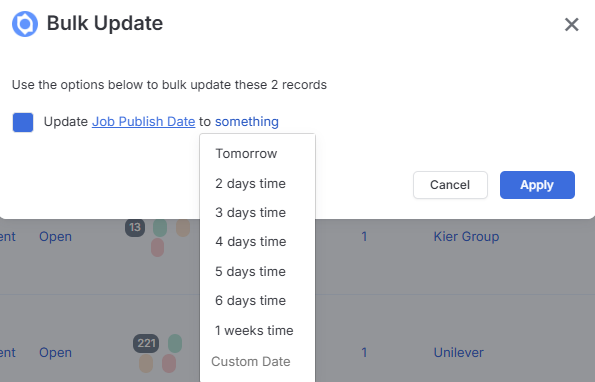
Need to schedule a batch of roles to go live at the same time? You can now set the Publish Date across multiple Job records without touching each one individually.
Select your Jobs, click Action > Bulk Update, and choose “Job Publish Date” from the field dropdown. Pick a relative date (Tomorrow through to 1 week’s time) or choose Custom Date to enter a specific date, then click Apply.
Edit Publish Job Description Separately
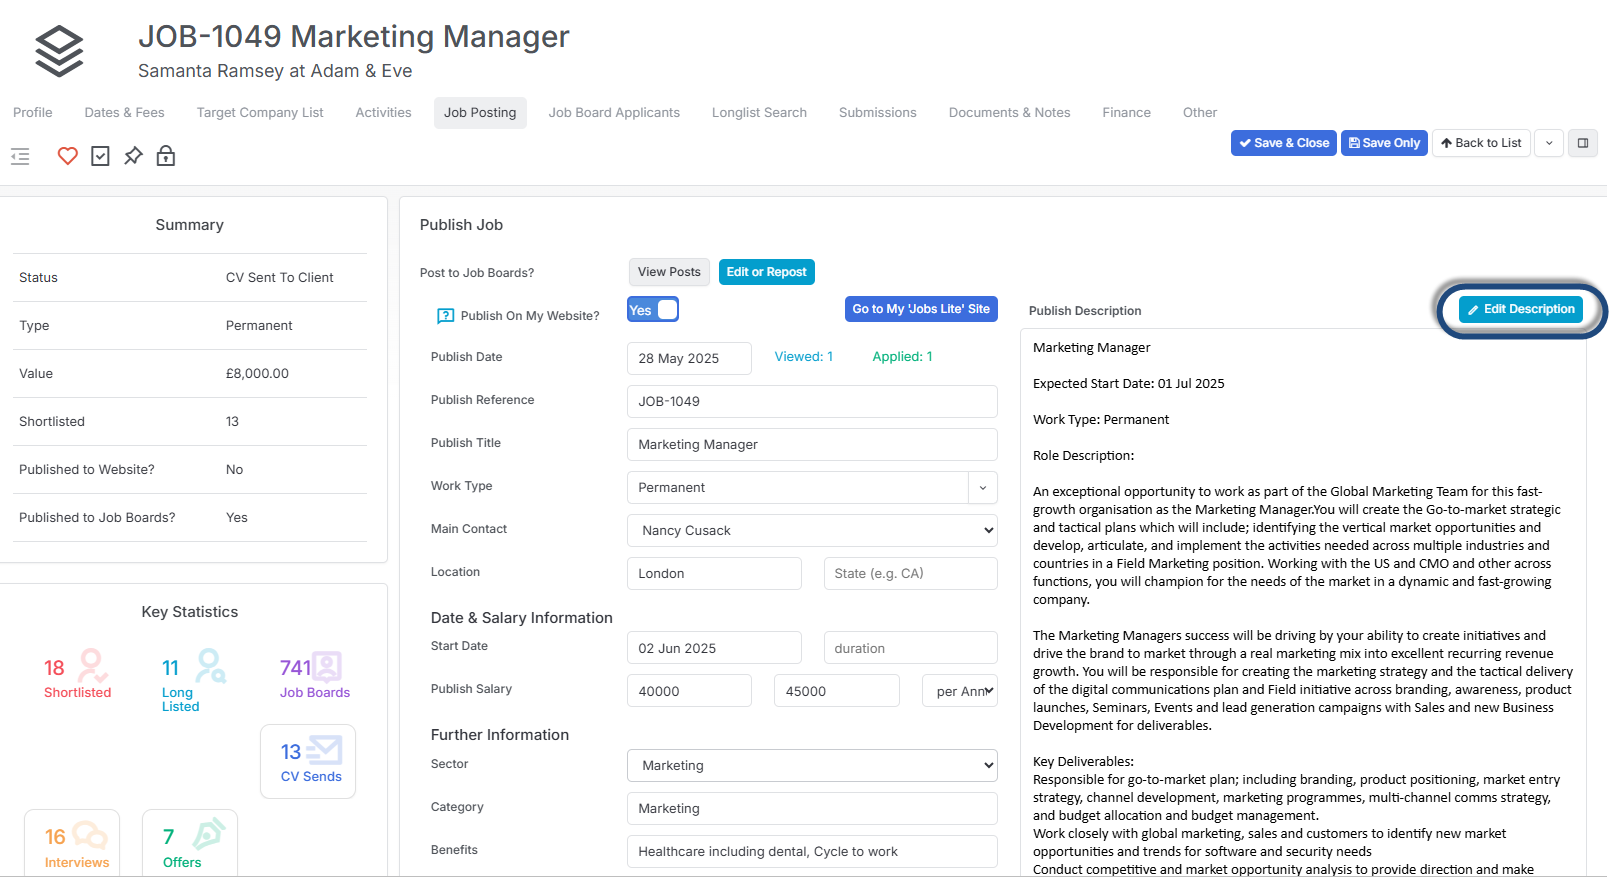
The Publish Description field on the Job Posting tab is now read-only by default. Clicking the new Edit Description button opens a dedicated rich text editor overlay, where changes are saved in isolation, completely independent of the rest of the Job record.
This eliminates a frustrating data conflict that occurred whenever two users saved changes to the same Job simultaneously. Previously, editing the description inline meant any save could overwrite unrelated changes made by a colleague in the meantime. Now, each saves without interfering with the other.
The same isolated save behaviour applies when publishing directly to integrated job board partners such as LogicMelon.
New Candidate via Client Portal - Duplicate Handling
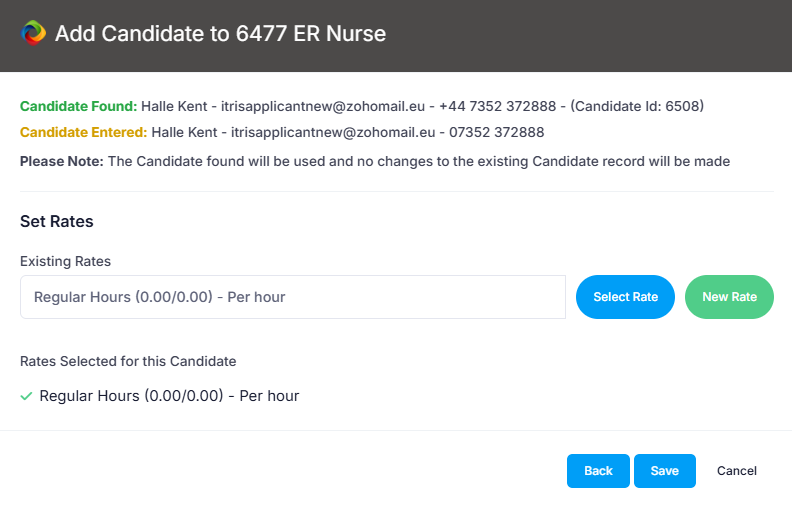
When a client submits a candidate through the Client Portal and a matching record is already found in the system, the duplicate confirmation popup now displays a structured side-by-side comparison. Recruiters can see exactly which fields were matched and how the submitted details differ from the existing record - replacing the previous generic caution message that offered no useful context.
The existing candidate record is used without modification, and this is clearly stated within the popup. Where no duplicate is detected, behaviour remains unchanged.
CV Timeline History - Education & Gaps
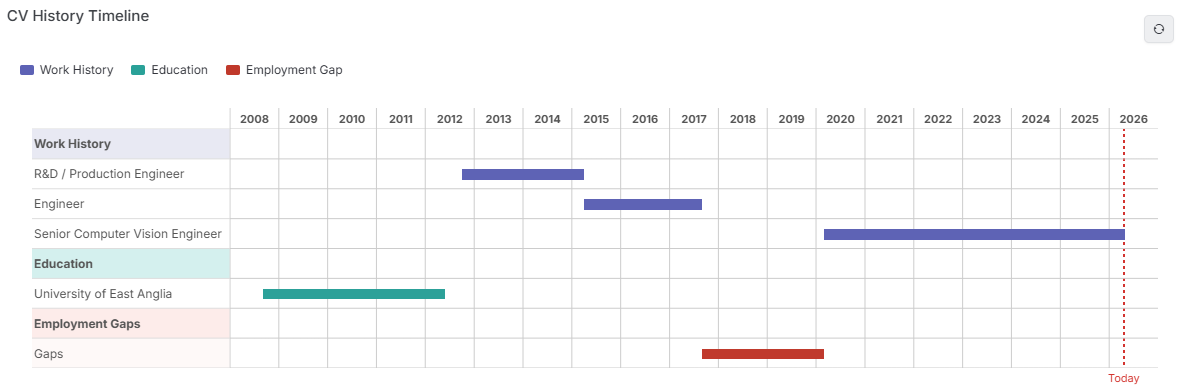
The CV History Timeline has been enhanced to give you a richer, more complete picture of a candidate’s background at a glance. Alongside the existing work history visualisation, which makes it easy to assess career progression and spot overlapping roles, the timeline now incorporates education history (shown in green) and employment gaps (highlighted in red).
This means you can instantly understand not just where a candidate has been, but when they were in education, and where periods of unemployment may need further exploration, all without having to read through the CV line by line. For consultants working at pace, this significantly reduces the time spent sense-checking candidate histories and supports more confident, informed decisions before screening calls or submissions.
Handling Marketing Activities
We’ve made a number of improvements to give users more control over how marketing activities appear across records and views.
For teams doing a high volume of outbound marketing, activity logs can quickly become cluttered, making it harder to see genuine interactions and pick up where you left off with a contact. These changes put you back in control, so your activity data reflects what actually matters.
Default activity settings - control visibility of outbound marketing activities
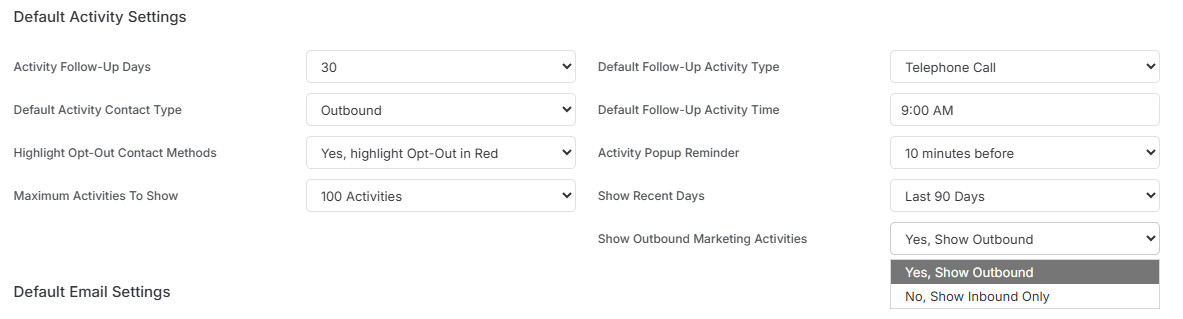
There’s a new setting in Display Settings > Default Activity Settings called “Show Outbound Marketing Activities”. You can choose to show outbound activities (the default) or limit the view to inbound only.
For teams where marketing activity is high volume, switching this off means consultants see a much cleaner picture of their meaningful touchpoints without having to filter through the noise.
Activities grid - toggle outbound marketing activities on records
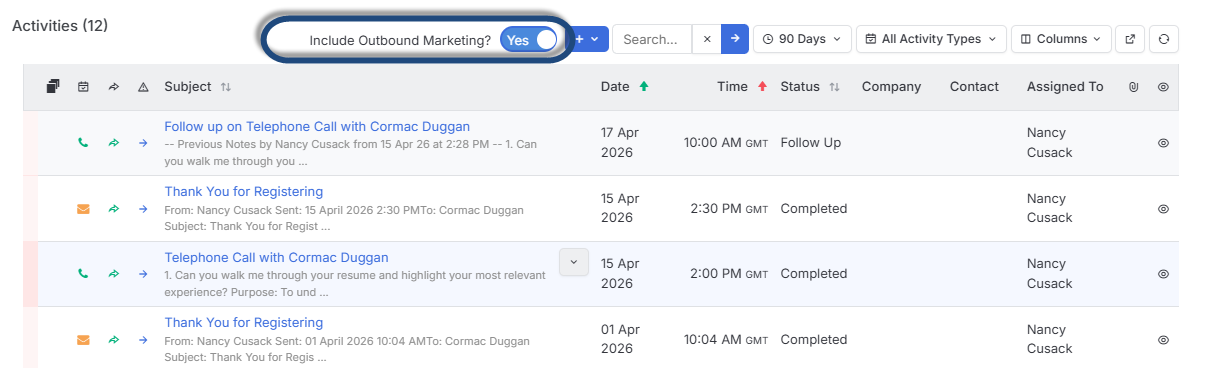
There’s a new “Include Outbound Marketing” toggle on the activities area on records. It mirrors your “Show Outbound Marketing Activities” default setting mentioned above, but you can override it on the fly, which is handy when you do want to check marketing engagement for a specific contact without changing your global settings.
Activities view - filter on outbound marketing in search
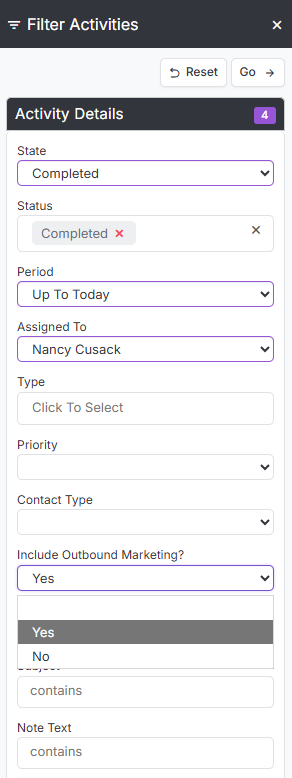
A new “Include Outbound Marketing?” filter is available in the Activities view.
Leave it blank and you’ll see everything. Set it to Yes to include all marketing-flagged activities, inbound and outbound, or No to show inbound only.
This makes it much easier to analyse genuine engagement and spot contacts who are responding to your marketing without having to wade through every outbound send.