Introduction
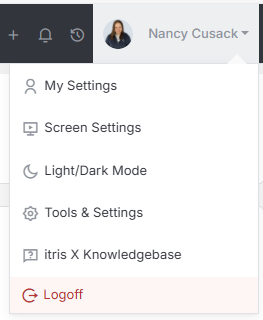
Job Settings are managed within Tools & Settings, which is accessed via the profile menu.
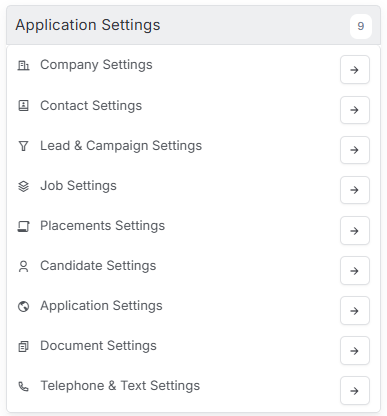
Within Tools & Settings under the Application Settings sub-menu you will find Job Settings.
Please note access to this area is permission based, see the article Tools & Settings | User Groups for more details on permissions.
The settings available in the area are detailed below, once you are happy with your selection you will need to save these settings before navigating away.

General Settings
Under General Settings you can select various defaults to be applied when a new job record is created and more.

Job Prefix
This allows you to set the prefix for job records, this can be just one letter should you wish. This prefix will be followed by the record number assigned to the job once it’s created.
Show Contract Times
Show start and end times in the Job Dates block of job records. See the Job Record article for more details.
Auto Refresh Job on Status Change
When the status of a job’s candidate changes, you may also have changed the value of the Job within the Placement Record. You can choose for that change to reflect on the job profile or not. See Placement Record for further details.
Allow Estimated Value Entry
Adding an estimated value when you create the Job can be useful for forecast purposes, but can not be relied on. This option can allow for estimated values to be used, or to force users to select values set in Products & Services.
Products and Services can be created to use on jobs and invoices. Having a list of Products to select from makes it easier for users to put together a Quote and or Invoice and ensures that the correct codes, values, and currencies are included. See the article Tools & Settings | Products & Services for more details.
Default Work Type
A Default Work Type can be selected from this dropdown so when a Job is created, the job is populated as this type. This means that the relevant financial options are generated within the Job Value block, for example for temporary roles pay and charge rates, and for permanent roles salary and fee.
Should you wish to add or edit any of these Work Types, see the Job Types section below.
Search Settings
A search for Candidate’s to longlist to a job can be initiated from a Job record, which can be influenced by the below settings. To learn more about the search functionality see the article Job Record | Longlists.

Auto Search Zip Code
Choose whether you want the Postcode for the job Location to be automatically populated and searched against within the Long List Search.
Weighted Search Terms
Weighted Search Terms can be added for a Long List Search so that if you add search words, the first one you add will be deemed the most important in rank and then the second, third, etc.
Include Radius in Match Jobs
From the Action button of Candidate records you can find Matched Jobs, this functionality performs a reverse search against all open jobs to see if the Candidate would be suitable. You can choose for this feature to find Candidates that includes both a radius and Boolean search criteria, or just Boolean. See the article Candidate Record | Job Match.
Private Long Lists
Here you can allow Users to create Private Longlists against Job Records so that they can work on their own list, rather than a shared one.
Enable Semantic Search
Semantics’ works by looking at the words and phrases you are using to find Candidates and makes suggestions as to other possible words and phrases that you might also want to include, in order to provide a more comprehensive search result. See the article Job Record | Longlists for more details.
Here you can choose to disable Semantics, use Daxtra’s Semantics or use Semantics you create via Skills. This last option to create your own is generally used by those recruiting into very niche markets where the Daxtra options may be too broad. See the article Tools & Settings | Skills Profile for more details.
Radius Measure Units
Set the radius units preference to Miles or Kilometres.
Financial Settings
This area contains a number of financial settings that can be applied to job and placement records.

Fixed Target Margins
If a fixed target margin has been set against a Job Type (see below) such as Permanent with a fixed target margin of 20%, you can choose from the dropdown as to whether you want this to fix this so it can’t be altered, or allow them to be edited.
Revenue Days Calculation
If using revenue profiles, you can select from the options here: Calendar Days, Standard Working Days, Split Equally by Month.
Job Value as Sum of Working Candidates
If you have multiple positions for a role and wish to see the job value total as a sum of all Working Candidates, select ‘Yes, total of all working Candidates’ from this dropdown. The calculation uses the Probability assigned to Job Statuses, see below, and is then reflected in the Factored Value field within the Job Value block of the job record.
Enable Company Credit Approval Checks
If this is selected you will need to make sure that a Company Credit Approval status is checked before making a placement or filling a job. This can be done by those that have access/visibility of the Invoicing Details block on a company record.
For more details on customisation of Blocks within records please see the article Tools & Settings | Layout Designer.
Pay & Charge Rate Source
With this setting you can choose the source of the pay and charge rates that are added to the placement, for example they can be taken from the Candidate desired pay/salary, the job record the placement is associated with or via the Job’s Type (see below) .
Lock Revenue for ‘Won’ Business
Once a Job is set to a Status of ‘Won’ you can set it here to ‘Lock the Revenue’ amount, or ‘Allow Re-Calculation’. A job is identified as ‘Won’ by the job status, see below.
Global Opportunities
If you have multiple Territories, you can select ‘Yes, allow cross Territory Jobs’ here in order for people in the other Territories who have no view of your data, to see all Jobs across the business. For more information on Territories please see the Tools & Settings | Application Settings article.
Workflow Settings
This area contains a number of settings that can impact the workflow on job records.

On business ‘Won’, set Account to
This dropdown contains your Client Types. When you win an Opportunity/Job, you can select one of the above so that the Client Type automatically updates, perhaps from ‘Prospect’ which it may have been when the Job went live, to ‘Client’.
A job is identified as ‘Won’ by the job status, see below for more details.
Multiple Positions
If you are likely to create Jobs which will require Multiple Positions, select ‘Yes, allow for Multiple Positions’ from this dropdown. If you will only ever have one role per Job, select ‘No, only 1 position per Job.
Workflow on Multiple Positions
If there are multiple positions for a role, this dropdown allows you to choose whether Workflows are applied when the first Candidate is placed, or when all Candidates are placed, for example changing the status on Job and Candidate records when they are placed, see Tools & Settings | Placement settings for more details.
Update Job Values and Dates
If you set different Job Dates and Values against a Placement Record, you can set it here to automatically update the main Job dates and Values too.
Update Candidates Dates from Job
If the dates in a Job Record alter from those originally set, you can select to filter this change down to the Candidates in the placement.
Job Statuses
Job Status shows the highest submission level on a Job, to give you an at a glance indication of the job’s progress. Job Status is found in the Job Details block on a job record, and in the summary panel.
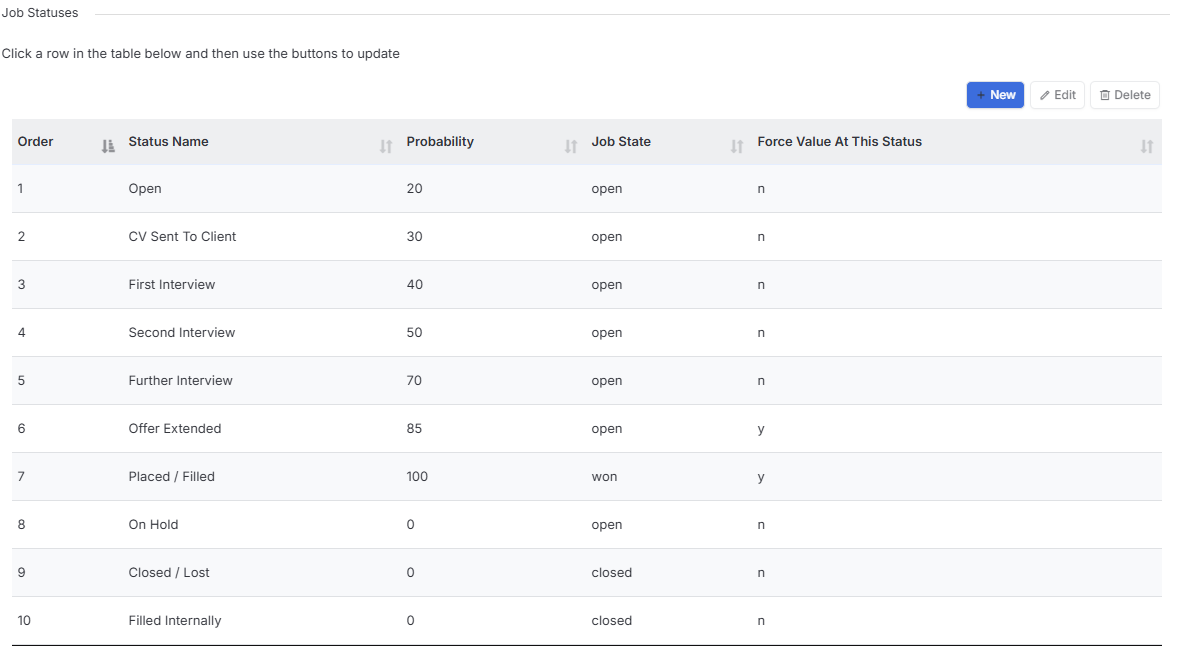
The order dropdown is used to determine where in the list of Statuses you wish it to appear.
The Job State can be either ‘Open’, ‘‘Closed’, ‘Won’ or ‘Renewal’. For example, if the Job Status name refers to a Job which is Open, then the Job State would be ‘Open’. If it were a Job Status of ‘Dropped’ the Job State would be ‘Closed’.
The Probability dropdown is used to select a percentage of where you consider this Job to be out of 100% at this Status. For example, if you are at a status of ‘2nd Interview’, you would presume that the probability of you winning this Job is roughly 80%. Therefore, when you hit a status of 2nd Interview, if you have added a Value to the Job, you would now be sat at 80% of that value. A Status of ‘Placed/Filled’ would have a probability of 100%.
If you select Yes under Force a Value at this status, when you then when save a job that has reached that job status you will be required to set a value for the job if not already done so. Selecting No will allow the job to be saved with a zero value.
Job Types
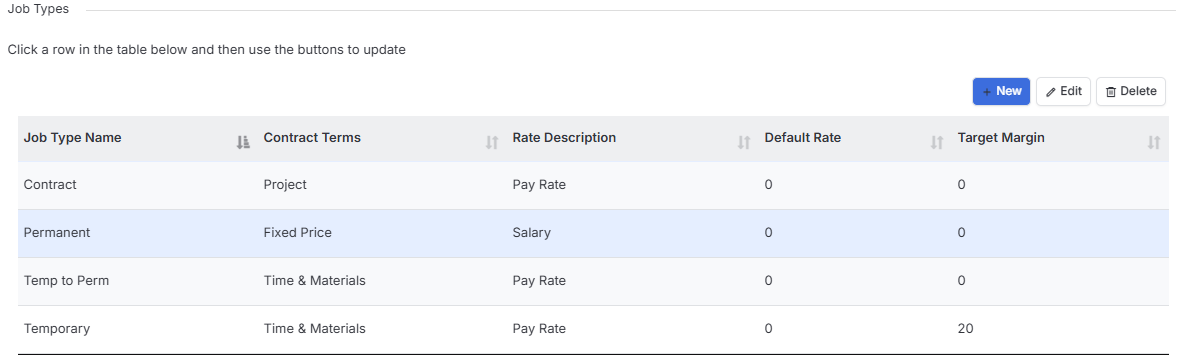
When creating Job Types you can input settings that will impact the available data fields on the job record. Job Type is found in the Job Details block on a job record.
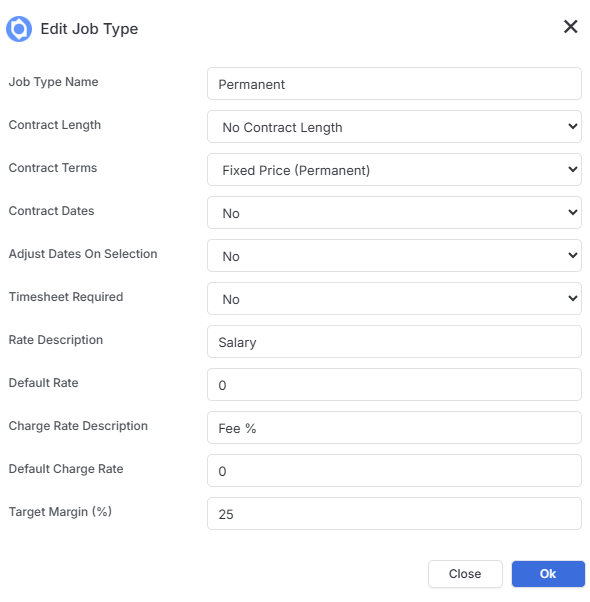
Available settings include Contract Length (that can be set No Contract Length), Contract Terms (e.g. fixed or time), default pay/charge/margin and more.
For example, with a permanent job you might set as shown in the example below, where there would not be a contract length (whereas a Contract role might typically be 3 months), Fixed Price terms will mean you add in a Salary and percentage Fee and won’t require Contract dates as there would not be an end date.
With Temp/Contract roles you are likely to set Contract Terms to Time & Materials or Project as these will require start & end dates and pay & charge rates.
Adjust dates on selection will update the placement from the job & vice versa automatically and is most commonly set to No.
Job Owner Role
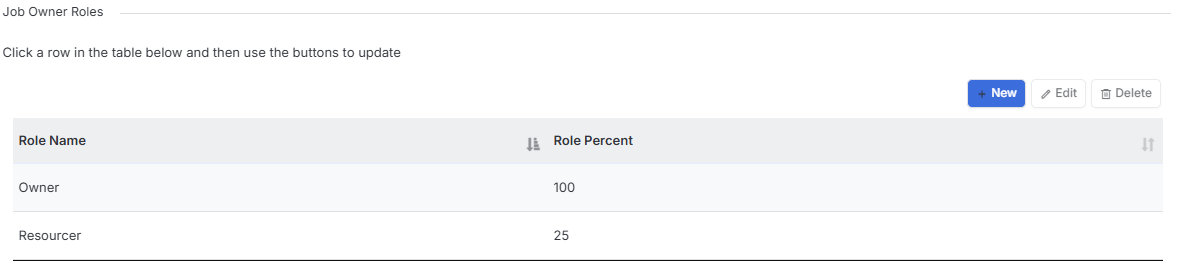
If a Job is to be shared by up to 6 employees, you can create user roles and add a percentage for each and when this is added alongside an Owner Name, the system will automatically calculate the Commission Value for each Owner. Job Owner is found in the Job Details block on a job record.
Business Types
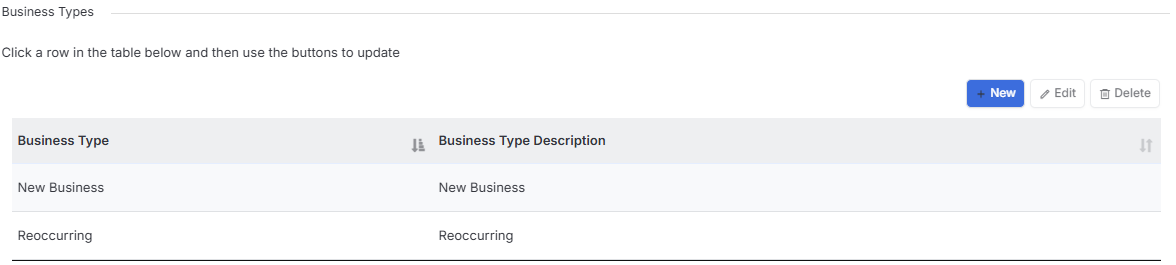
Business Types can be created to determine the type of business a Job is associated to, be it ‘New Business’ or ‘Existing Client’. This can then be reported on to see how many roles have been created for purely ‘New Business’ for example.
Business Type is found in the Job Details block on a job record.
Renewal & Clone Settings
This area contains a number of settings applied when jobs are cloned or renewed.

Copy Job Products
When you Renew or Clone a Job record, you may choose to Copy the Job Products which were added at the original Job, over to the Renewed, or Cloned version. See the article Tools & Settings | Products & Services for more details.
Copy Job Candidates on Renewal
Choose which (if any) Candidates added to the original Job are carried over to the renewed Job.
Copy Job Candidates on Clone
Choose which (if any) Candidates added to the original Job are carried over to the cloned Job.
Copy Job Documents
If you have attached Documents against the original Job and they are also relevant to the renewed/cloned Job, you may copy them over.
Renewal Business Type
When you create a Renewal/Cloned Job record, you may select a default Business type from the dropdown. See the Business Types section above for more details.
Renewal Status
Set the default Job Status for the Renewed/Cloned Job, see the Job Statuses section above for more details.
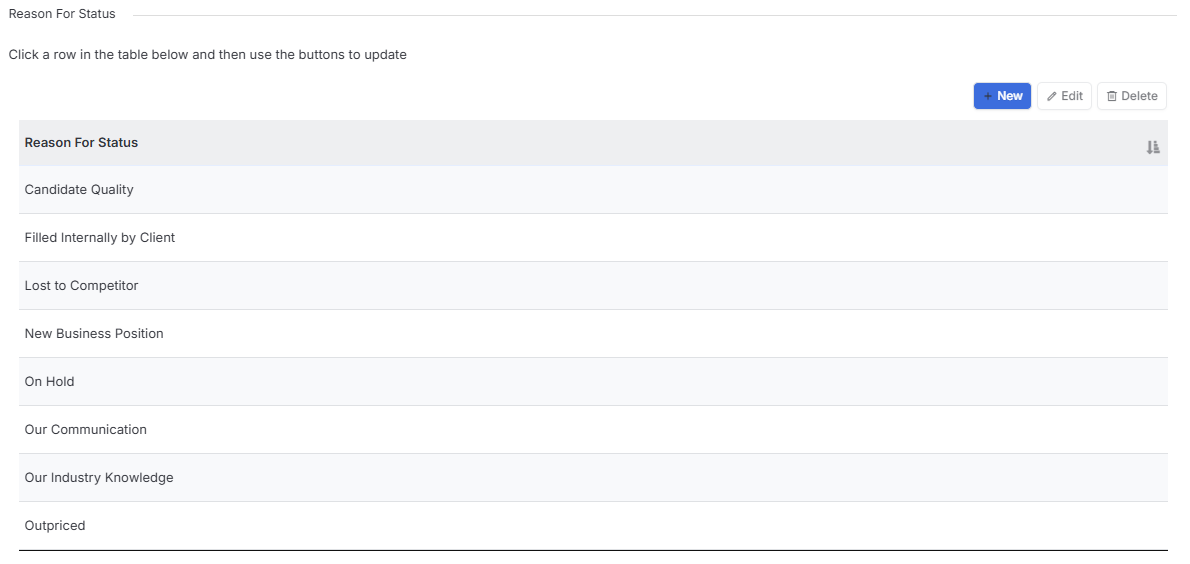
Reason for Status
A Reason for Status can be added in a Job record to determine ‘why’ the Job has had the specific Status selected, this is important for not only know why you might have lost a role, but also and perhaps more importantly what you did right to fill it. If a Job is at a Status of ‘Lost’ for example, you would add a ‘Reason for Status’ of ‘Client Filled Internally’, but a winning status might be due to how well your candidates were briefed before an interview.
This field can be set as a mandatory field for job records and is found in the Job Profile block on a job record.
Job Board Settings
Jobs can be posted externally direct from within the Job Posting tab of a job record, here are various settings that apply for this workflow.
(Please note due itris being highly customisable this tab may have an alternative name in your version).
For more details on posting jobs please see the article Job Record.
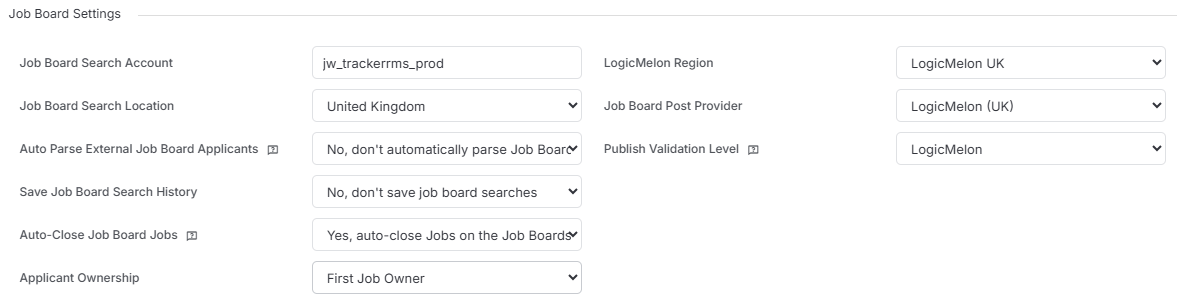
Job Board Search Account
This field will contain the unique Account Details generated for your Company in order for you to use the Job Board Search facility
Job Board Search Location
Choose the relevant Location for your Job Board Searches from this dropdown.
Auto Parse External Job board Applicants
When an application comes in via a Job Board, you can now choose exactly what happens next:
No, don’t automatically parse applicants- the applicant appears on the Job Board Applicant block only, but no candidate record is created. This keeps your candidate database clean and uncluttered if you’re not ready to bring them in.
Yes, automatically parse applicants- a candidate record is created automatically and they’re linked to the job via the Job Board Applicants block, without being added to the shortlist or longlist. Perfect for keeping track of all applicants while deciding who to progress.
Yes, automatically parse and shortlist applicants- a candidate record is created and they’re immediately added to the job’s shortlist, so your most promising applicants are ready to review straight away.
Yes, automatically parse and longlist applicants- as above, but candidates land on the longlist instead, giving you a structured way to capture wider applicant pools before narrowing down.
Auto Parse Candidates
From this dropdown, choose whether you wish to automatically Parse and Shortlist your Candidates from the Job Board, or not. Or, you may select to automatically Parse to the Longlist.
Save Job Board Search History
If you would like to save your job board search history you can do so by clicking ‘yes’ on this option.
Auto-Close Job Board Jobs
This option controls whether Job Board Posted jobs auto-close when the job moves from an Open to Closed Status.
Applicant Ownership
This setting controls who is assigned as the Candidate Owner when a candidate is created through a Job Board application.
Choose from the following options:
- First Job Owner - assigns ownership to the first owner listed on the job
- Main Job Posting Contact - assigns ownership to the primary contact for the job posting
- Default Candidate Owner - uses the default owner defined in Candidate Settings
The relevant alerts will be sent to whichever user is assigned ownership.
LogicMelon Region
If you are a LogicMelon user, you will need to select a Region from this dropdown of either UK, or US.
Job Board Post Provider
In this dropdown, you will need to select the Job Board Post Provider. Choose from:
- LogicMelon UK Integration
- LogicMElon US Integration
- Broadbean Integration
Publish Validation Level
Select the appropriate option based on your preferences.
Broadbean API Key
If you are a Broadbean User, you will be given an API Key and this will need to entered here to link your Account with itris.
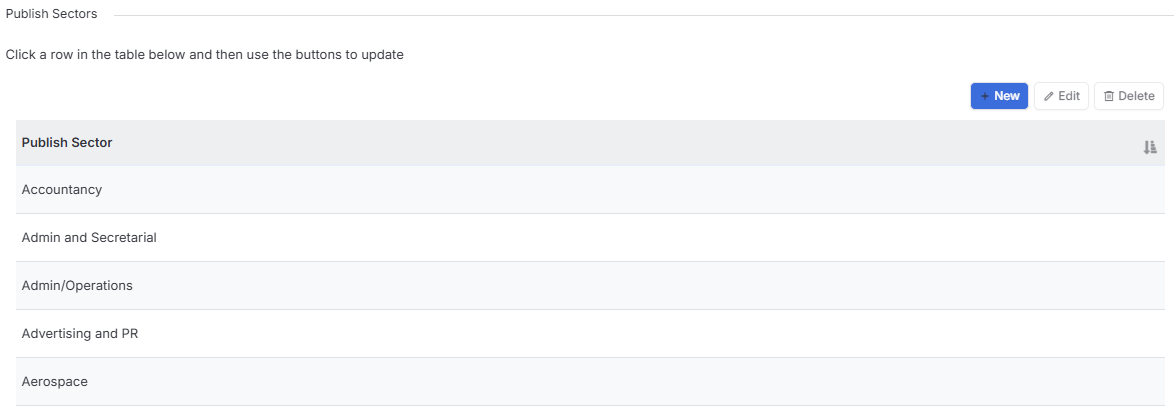
Publish Sectors
You may add as many Sectors that you wish to Publish to in this section. One of these is then added to the job record via the Publish Job block, see the article Job Record for more details.
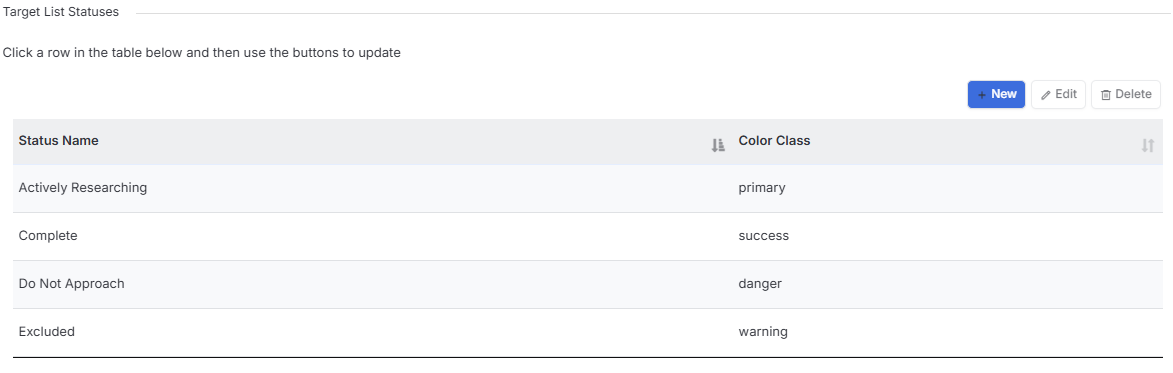
Target List Status
This list is used for the creation of Target Company Lists within a Job record. This list is used by recruiters to research and secure Candidates from various organisations.
This list shows the Company, the Owner and who added that Company, along with the target list status, active note and the number of Candidates linked to that company who reside on either the Longlist or the Shortlist.
Statuses are fully customizable from Job Settings (both name and colour coding) and this list can also be filtered based on those statuses allowing you to focus on the most important.