Introduction
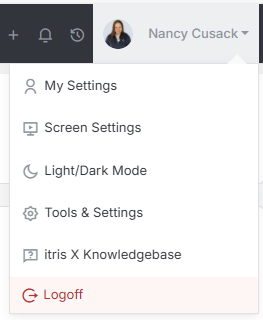
Placement Settings are managed within Tools & Settings, which is accessed via the profile menu.
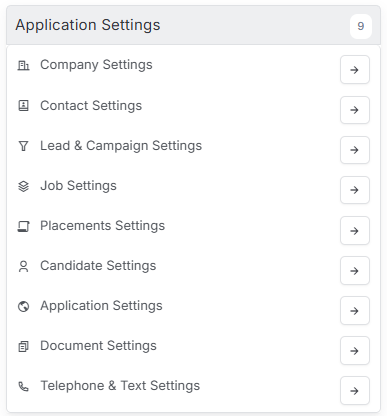
Within Tools & Settings under the Application Settings sub-menu you will find Placement Settings.
Please note access to this area is permission based, see the article Tools & Settings | User Groups for more details on permissions.
The settings available in the area are detailed below, once you are happy with your selection you will need to save these settings before navigating away.

General Settings
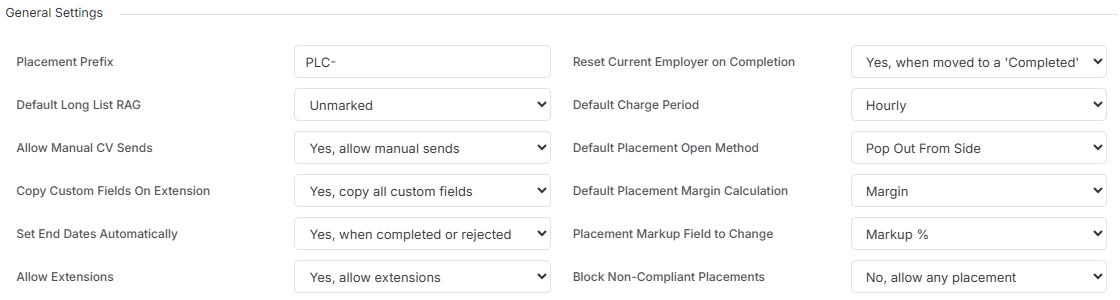
Under General Settings you can select various defaults to be applied when a new Placement record is created and more.
Placement Prefix
This allows you to set the prefix for placement records, this can be just one letter should you wish. This prefix will be followed by the record number assigned to the placement once it’s created.
Default Long List RAG
This setting determines the default traffic light colour (Red, Amber, Green) that is applied to new longlisted canididates when found in a long list search and added to the Long List.
Options are:
- Unmarked
- Red
- Amber
- Green
Allow Manual CV Send
This controls whether Manual CV Sends are allowed and will show or hide the Mark CV Send option in the Shortlist menu. Setting this to No will force users to physically send CV’s by email in order to register the CV send for KPI purposes.
Copy Custom Fields on Extension
This setting allows you to carry over any custom fields associated to the placement record when doing a full extension. A full extension creates a new placement record and if enabled, all custom fields will appear on the new placement created.
Set End Dates Automatically
If enabled, this setting will automatically set the end dates once moved into a completed or rejected placement status, with the end date being the day moved into that status. If disabled, this setting will leave the end dates unchanged to what they were originally set to.
Allow Extensions
Allow placement records to be extended. A full extension creates a new placement record.
Reset Current Employer on Completion
This option will reset the Current Employer to blank once a Candidate completes an Assignment, or leave it as it is following completion of an Assignment. This is triggered when a Candidate on a Shortlist or in an Assignment Team is set to a completed Placement Status.
Default Charge Period
This option sets the default charge period for Candidates assigned to a Shortlist or Assignment Team list and should reflect the most common charge period your business uses. It can be changed within the Placement record if required.
Options are:
- Hourly
- Daily
Default Placement Open Method
This setting will allow you to choose how the placement record opens when opened from the shortlist. The options are:
- Pop Out from Slide: This will open the placement record while keeping you in the shortlist on the job record.
- Open Full Record: This will open the full placement record taking you away from the job record page.
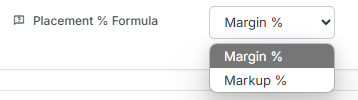
Default Placement Margin Calculation
This setting allows you to choose whether you want to apply margin calculation or markup calculation within the placement value calculations.
On a job record under the job values section, you will see where this can be selected from the drop down. The default option can be set in this section from tools and settings to apply in all new jobs.
Placement Markup Field to Change
This field will allow you to choose whether you want the charge rate or the markup % to be applied into the calculation of your placement value. You can find the markup field in the placement rates section.
Block Non-Compliant Placements
This setting prevents the progression of a submission to Working or Offer statuses where the candidate is not compliant.
Shortlist Settings

Allow Skill Coding on Shortlisting
This determines whether you wish to auto Skill Code your Candidates when they are Shortlisted in order to perform a Skill Search for the Job. If you don’t use the Skills Profile Builder, or simply don’t wish to auto-code, select No, do not auto-code.
Default Short List RAG
This setting determines the default traffic light colour that is applied to new shortlisted Candidates when found in a long list search and added to the Short List.
Options are:
- Unmarked
- Red
- Amber
- Green
Default Shortlist Order
Choose how candidates are ordered in the Shortlist Kanban view. You can now sort them alphabetically or by the date they were added to the job, giving you more control over the review process.
Default Short List Menu State
This setting allows for the drop down menu of a shortlisted record to either be collapsed showing all menu options, or expanded by default.
Quick Reject Placement Status
When using Quick Reject via the Candidate Quick View in Submissions the status set here will be applied to the candidates submission.
Quick Accept Placement Status
When using Quick Accept via the Candidate Quick View in Submissions the status set here will be applied to that candidate’s submission. Placement Statuses available to select are those whose Status Event is set as Shortlisted by User (see the section below Placement Record Statuses).
Shortlist Drag & Drop Settings
Enable and manage the drag and drop of Candidate s between submission cards in the shortlist area.
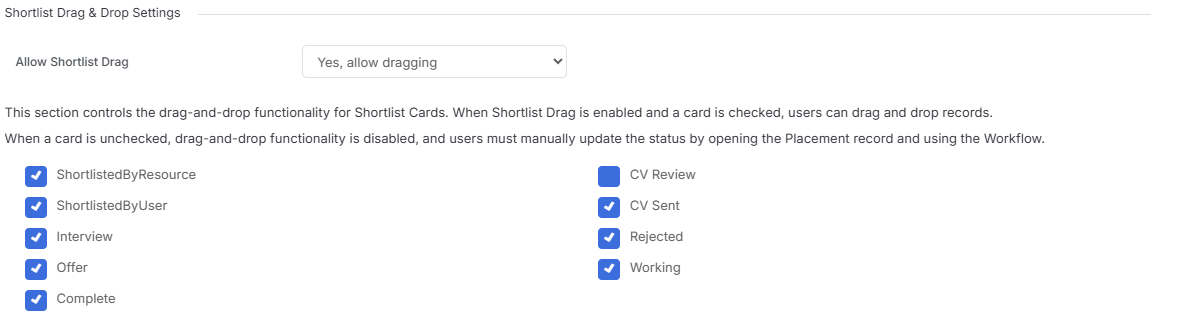
Allow Shortlist Drag
Shortlist dragging enables you to manually move Shortlisted Candidates to the next Card without creating an activity to trigger the Workflow, which would do this automatically. Select Yes, allow dragging to if this will be your preferred action, or No, use Workflow only if you want activities to determine the move from one card to the next.
You can choose which cards user can drag and drop records too by checking that card, ensuring drag-and-drop actions align with your specific requirements. By default all options will be ticked.
Default Template Settings
This section allows you to choose the Default Template for particular actions you take within the Shortlist. This can be changed when it comes to the point of sending, but generally, when a CV is sent, or Interview is created, you will want to send the same Template each time.

Placement Record Statuses
Placement Record Statuses track where the candidate is on the submission journey and you can have as many Placement Statuses as required.
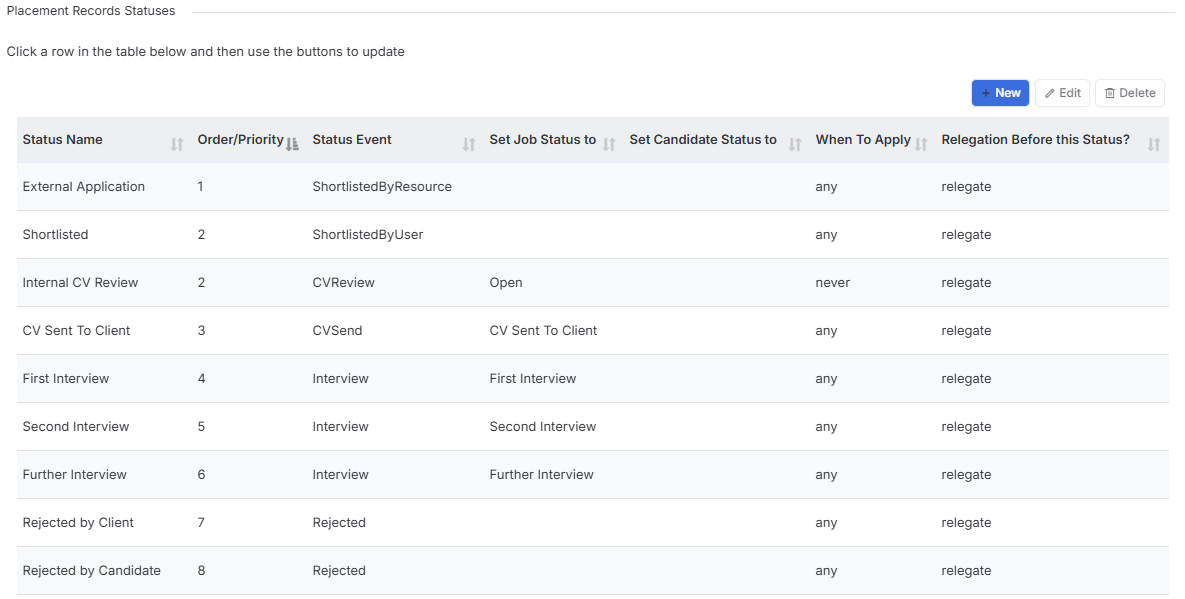
Order/Priority
This option dictates both the order the Placement Status is displayed when selecting it from the dropdown, and the order of the Status Events. The order is particularly important if you are using the option to drag and drop candidates between stages in the Jobs Submissions area. When you drag and drop somebody into a column in submissions area, itris X will automatically assign the first status it finds relating to that column. Using the below screenshot as an example, if a candidate is dropped into the Rejected column they will be assigned the status Rejected by Client (you can of course edit the status on a case by case basis once once you have dropped them into the column).
Status Event
Each Placement Status can be tied to a Status Event (this is a system list), that dictates which Submission Card/Column the candidate submission sits in on the Job Shortlist view (Kanban board), for example Shortlist, CV Sent, Interview, Offer, Working.
A Submission Card/Column will only be available to display on the Job record when there is a Status linked to it. See the Job Record | Submissions article for more details on Shortlist View.
Submission Cards
The names of the Submission Cards can be edited to reflect your workflow, see the article Tools & Settings | Display Settings for more details. The ability to name the Submission Cards and order the Status Events (which in card view work left to right) means this can be set up for your unique submissions workflow.
If a Placement Status does not have a Status Event linked to it, it will appear at the end (right hand side) of the Submission Cards.
Job and Candidate Status
Additionally, it can be set that when a Candidate hits a Placement Status, the Job Status on the Job Record can be updated to the value set.
In a similar way the Candidate’s Status can also be updated once they reach a Placement Status, this is most commonly used towards the end of the Placements Statuses, for example when a Candidate is placed.
These options mean the statuses of related records are updated automatically, creating efficiencies in the workflow.
Note these actions can be set to: not happen automatically at all, happen the first time only that a Candidate is moved into that submission status or anytime a Candidate is moved into that submission status. With the later, this means if you have a Candidate at interview, but then add another Candidate to CV Sent, the Job Status would update to CV Sent.
Relegation
Should you move a Candidate back a stage (e.g. Relegate them), you can choose for the Job Status to stay frozen at the previous status/level, or reflect the most recent status change. For example, you move a Candidate to Interview Stage and the Job Status updates to Interview to reflect this. Perhaps that Interview is pulled/put on hold and you move the Candidate back to CV Sent. If you choose the Relegation option Freeze, then the Job Status will remain as Interview. However, if you choose Relegate, the Job Status will update to CV Sent.
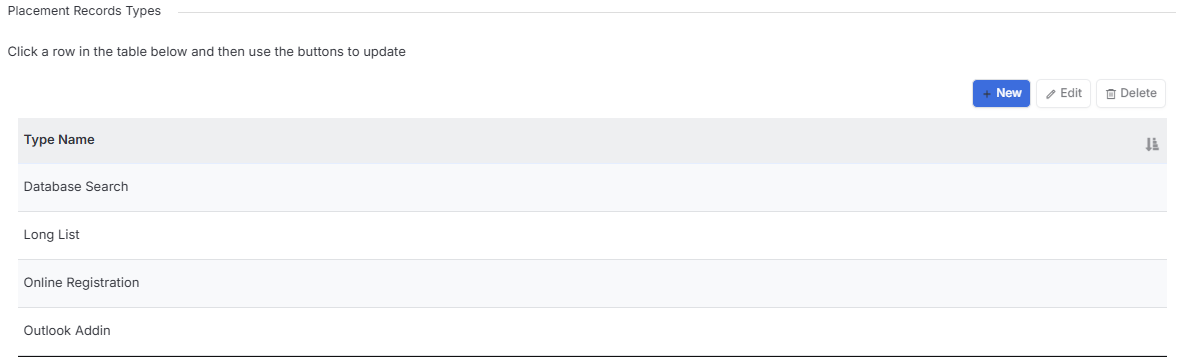
Placement Types
Placement Types determine where your Candidate came into the Shortlist from, for example, via the Outlook Addin, or an Online Registration.
Placement Status Events
This section allows you to create “Events” that take place when Shortlist Cards are dragged into certain Groups within the Job Shortlist.
They work by prompting the user to provide additional information whenever a Shortlist Card is dragged into the Group in the form of a popup that will ask the user to optionally select a Status Note that best describes the reason for the move to that Group.

Setting the Status Note Required to Yes will mandate that a Status Note is provided and setting it to No will allow for a blank Status Note, so is therefore optional.
If the Allow Free Text Status Note is set to Yes then they will be prompted to type a Status Note into the popup form. If the Allow Free Text Status Note is set to No then they will be prompted to select a Status Note from the Placement Status Notes defined in the section below, in the popup form.
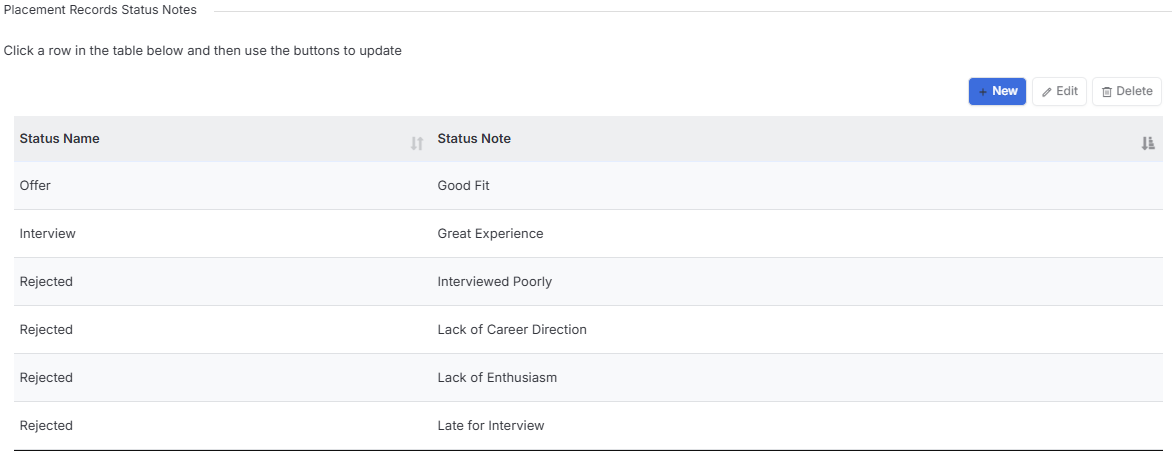
Placement Status Notes
This section allow you to determine fixed Status Notes in relation to one of the Placement Status Events in the section above and are useful if you would rather have set Status Notes rather than allowing users to enter free text Status Notes - which can be harder to report on as will vary greatly.
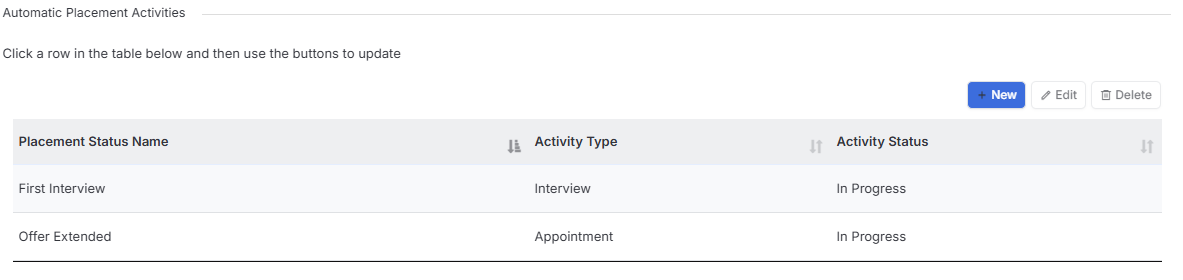
Automatic Placement Activities
In this section you can create your automatic placement activities so that you can create activities by simply moving candidates through the shortlist via dragging and dropping to the different shortlist groups.
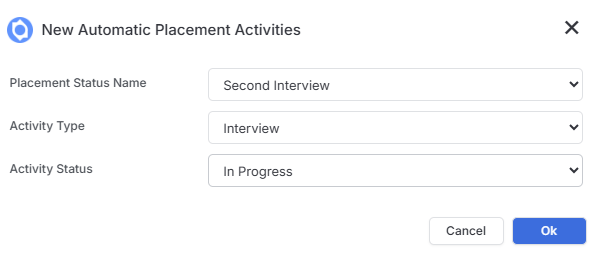
When adding the automatic activity, you can select the placement status that will trigger the automatic activity to be created, which activity will be created once it reaches that status and select the default status for that specific automatic activity.
Resource Summary
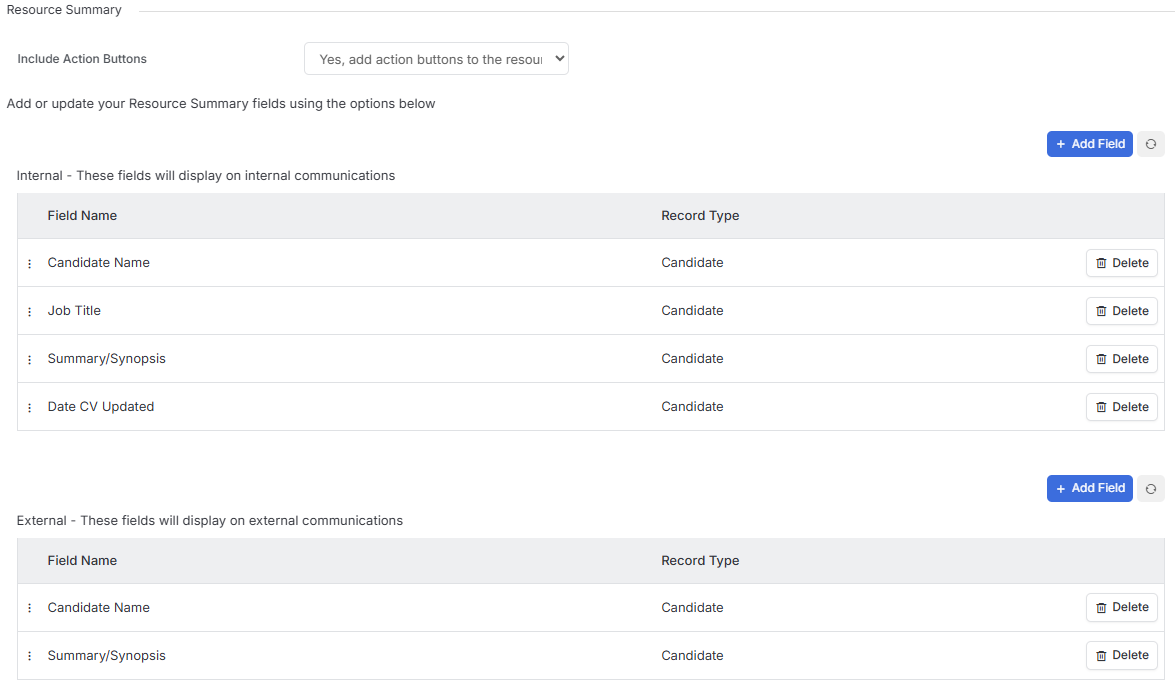
Resource Summaries consolidate key information from a candidate’s record into a single, reusable format to be included in email templates for communications sent to clients or colleagues. These summaries are used for CV submissions and internal candidate reviews.
Each summary is linked to a unique merge tag that is inserted into your email templates. When the email is sent, the tag automatically populates with the specific candidate data you’ve selected for that summary type.
By creating separate summaries for different purposes you can ensure that each email includes only the most relevant information for its intended audience. This flexibility means you can automatically tailor the level of detail and specific fields shared depending on the context, without manually editing each message.
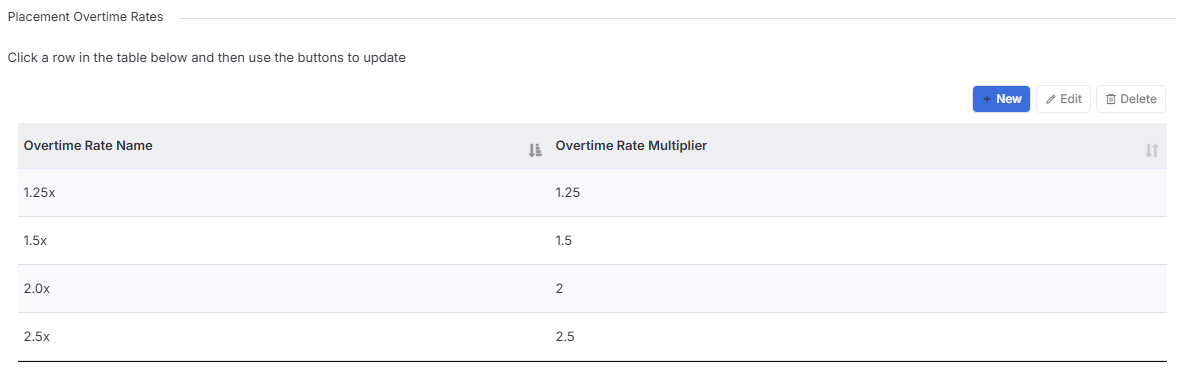
Placement Overtime Rates
In this setting you can create Placement Overtime Rates that will appear in the “Factor OT Rate” in the placement record. These values can then be selected from the drop down in the placement record.
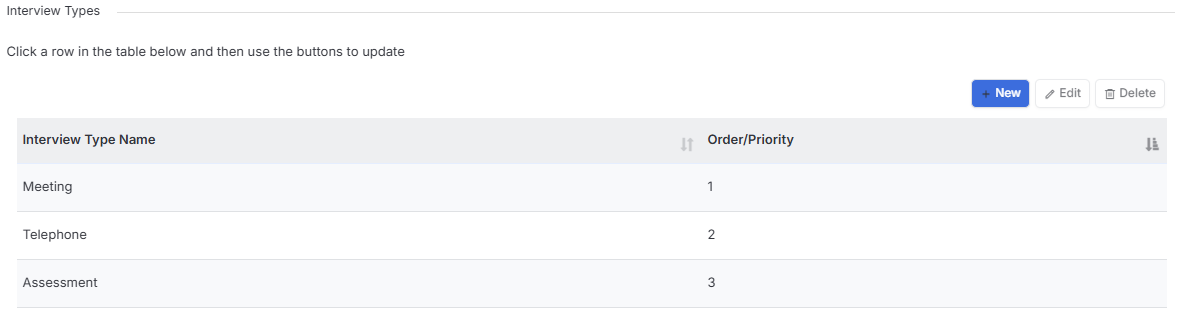
Interview Types
In this setting you can create the numerous different interview types that you typically carry out. This list of interview types will then be found on interview activities so you can select from the drop down.