
Introduction
Sending individual emails in itris allows you to maintain meaningful, personalised communication with your candidates and contacts. Whether you’re reaching out about a new opportunity, following up on an application, or simply staying in touch, itris integrates seamlessly with your email workflow while automatically tracking all correspondence as Activity on the relevant records.
While this individual email feature is designed for personalised, one-to-one communication, our Bulk Emailing and Campaign functionalities provide specialised tools for sending to multiple recipients with enhanced tracking and campaign management capabilities. For information about sending to multiple recipients at once, see our dedicated guides on Bulk Emailing and Campaign articles.
Accessing Email Functionality
You can initiate an email from multiple locations throughout itris, giving you flexibility to communicate whenever the moment is right:
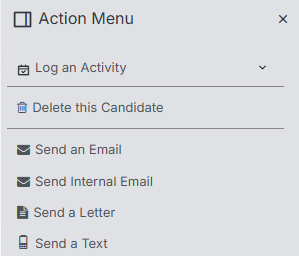
- Record Action Menus - Use the “Send an Email” option from any candidate or contact record. The system will automatically show you if the recipient has opted out of email communications, helping you stay compliant.
- Email Field Icons - Click the email icon that appears next to email addresses throughout the system for quick access.
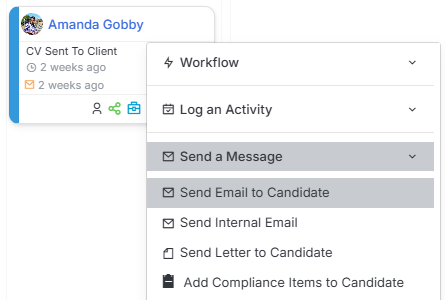
- Action Buttons - Send emails directly from Record Find Results, Shortlist cards, and other key locations where you’re already working.
Before You Begin
To send emails through itris, you’ll need to complete a one-time setup in your My Settings area. This is where you’ll configure your Email Integration and select your preferred email signature template. You can also set up email aliases if you need to send from multiple addresses.
For complete setup instructions, see our My Settings and Tools & Settings | User Email Signature Templates articles.
Email templates themselves are created and managed in the Tools & Settings area, allowing your team to maintain consistent, professional communication, see the Tools & Settings | Standard Templates article.
Composing Your Email
When you open the email composer, you’ll find all the tools you need to create professional, personalised messages:
Sender and Recipients
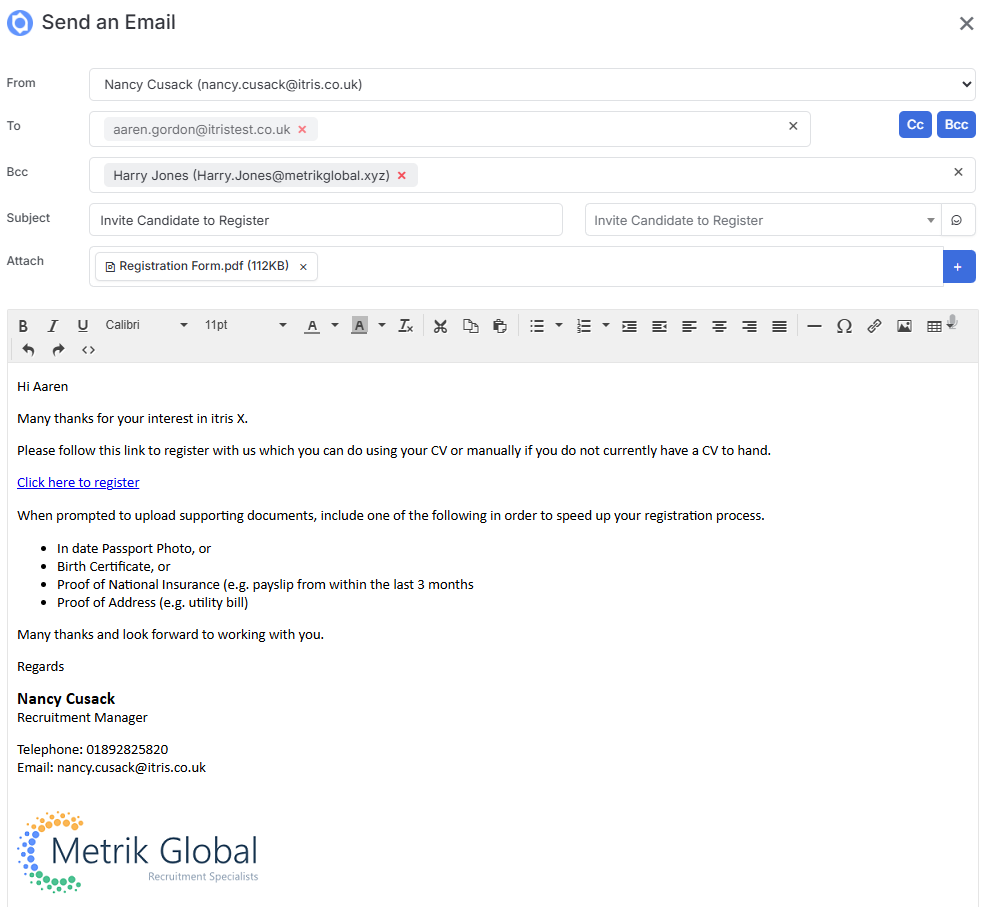
Start by selecting who the email should come from and who should receive it. If you’ve configured email aliases in your settings, you can choose to send from any of these addresses using the From field. Add recipients in the To field by searching for candidates, contacts, or users. You can also include CC and BCC recipients as needed.
Subject and Content
You can simply write your email here, alternatively there are a couple of options to make writing your email easier.
- You can select from pre-built Email Templates, which might include the complete message or simply helpful elements like first name tags for personalisation. See the article Tools & Settings | Standard Templates for more details on creating these templates.
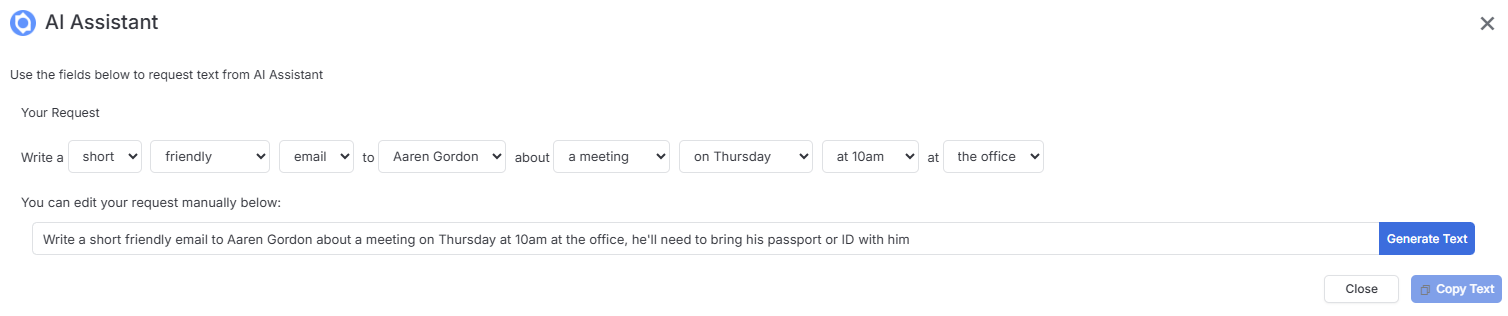
- The AI Assistant can help you draft your email by following prompts for length, tone, and purpose, with options available in dropdown menus or the ability to manually enter specific details before generating your text. You can then copy this generated content directly into your email body. If you prefer, you can also use the Dictate option to speak your email text.
- If you prefer, you can also use the Dictate option to speak your email text. Click on the microphone icon in the top right corner of the formatting area to start dictating.
Formatting and Attachments
The email composer includes all standard formatting options, allowing you to structure your message with tables, insert images from your itris Media Library, and style your text as needed.
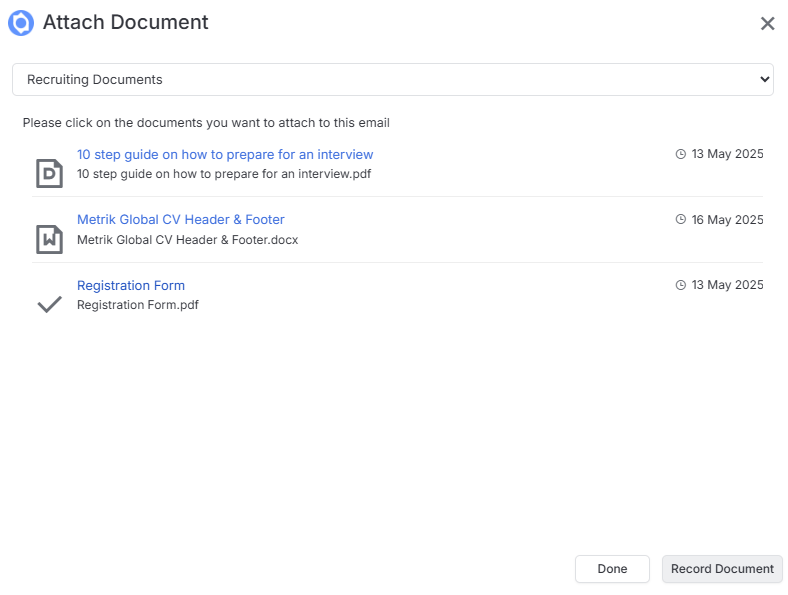
Use the Plus icon to attach documents either from the current record or from your Document Library. When choosing to add a document from the Library you will need to select the relevant folder from the drop down at the top of the window.
See the article Tools & Settings | Document & Media Libraries for more details on these areas.
Record Links and Assignments
Below the email body, you’ll see links to the relevant records. You can add additional record links as needed to provide context or reference points. You can also add user assignees to ensure the right team members are aware of this communication.

Post-Email Workflow Options
itris helps you maintain momentum after sending your email by allowing you to set up automatic follow-up actions:

Follow-Up Reminders
Set reminders to ensure you circle back at the right time. This helps you maintain consistent communication without having to remember every detail manually.
Record Updates
Configure the system to automatically update record information when the email is sent. The available update options depend on the record type you’re emailing. For example, when emailing a candidate, you can update their Status, Job Title, and other relevant fields. You can configure multiple updates to happen simultaneously, keeping your database current without additional manual work.
Sending Your Email
When you’re ready to send, you have several options to control how and when your email is delivered:
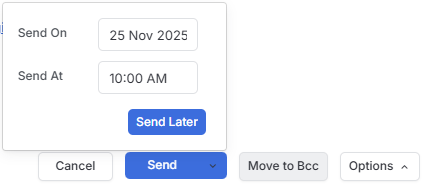
- Send Now or Schedule - Send your email immediately or schedule it for a specific time.
- Move Recipients to BCC - Protect recipient privacy by moving all addresses to the BCC field.
- Read and Delivery Receipts - Request confirmation when your email is delivered or opened.
Once sent, your email is automatically recorded as an Activity on the relevant records, ensuring you maintain a complete communication history without any additional steps.