Introduction
At the top the job record the name banner will display the job ID number, job title, along with the contact and company the job is created under.
Below the name banner the job record is comprised of tabs, and within those tabs are the record blocks. Due to itris being highly customisable, the order and name of the tabs, and the placement of the record blocks may differ to those shown in this article.
Below the tabs the are the Show/Hide Summary, Favourites and Tag Text buttons. Additionally, you have buttons to Save the record, return to the List (Find Records), next record in list button and the Action Menu.

Action Menu
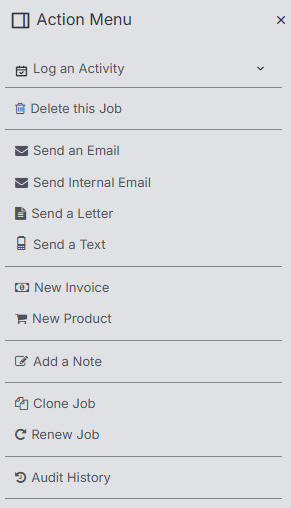
Via the Action Menu you can Log Activity (such as calls and tasks, note this is a collapsible list) against the job, delete the job, send emails/texts, create invoices and notes, Clone or Renew the job and view the audit history.
Clone Job
Cloning a job is effectively duplicating/copying it and creating a new Job. Details that will copy over include Pay, Charge, Products & Services (if set to do so in Tools & Settings | Job Settings). You can change the details, such as company, contact, salary etc, on the cloned job should you wish to.
Renew Job
If very similar to Clone Job in terms of creating a new Job record, copying over details etc. However, in addition it will retain a link between the Renewed Jobs, which can be navigated between via the link icon in the job’s name banner.

Summary Panel
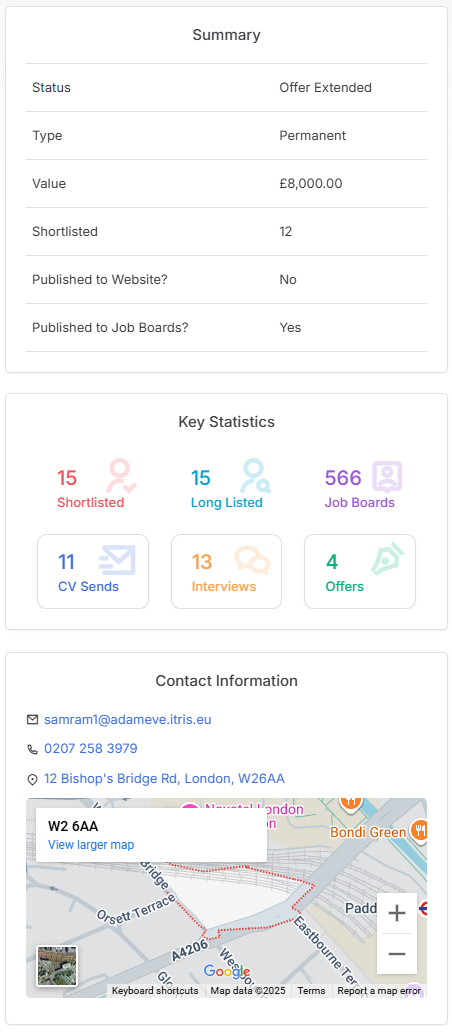
As noted above the Summary panel is expandable/collapsible. When expanded this displays key data about the job including its status, work type, value, number of candidates at the various submission levels (of which Submitted, Interviewed or Offered are clickable to view a list of candidates at those stages) and more.
Profile
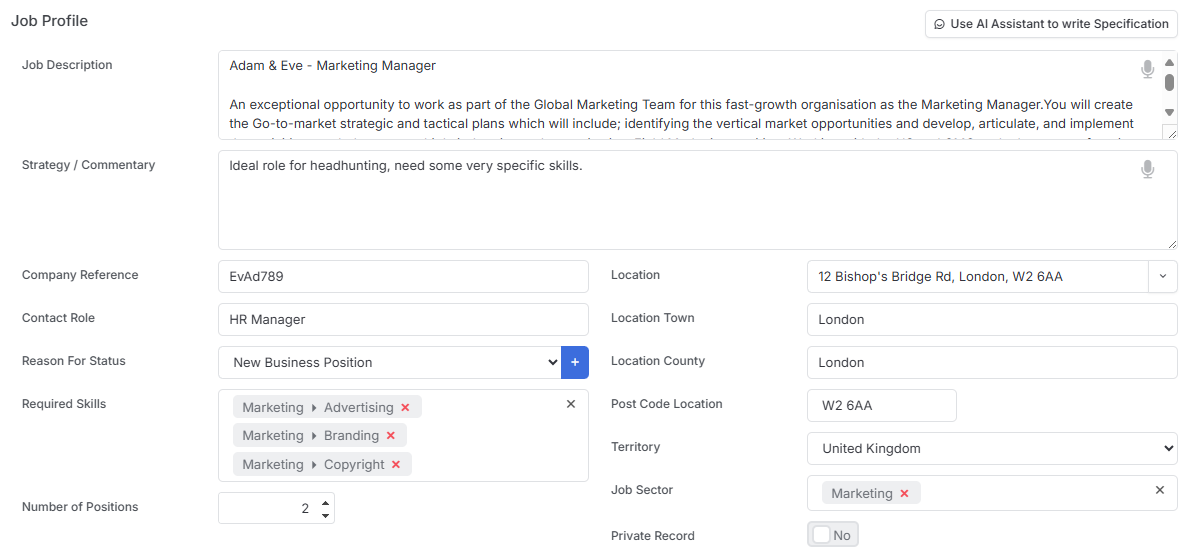
In the default layout the profile tab will house the Job Details and Job Profile blocks, providing details about the type of job, links to the company and contact the job is created under, job description, number of positions and more. The majority of data recorded here can be displayed in reports and used as filter criteria giving you flexibility on analysing your data.
Job Description
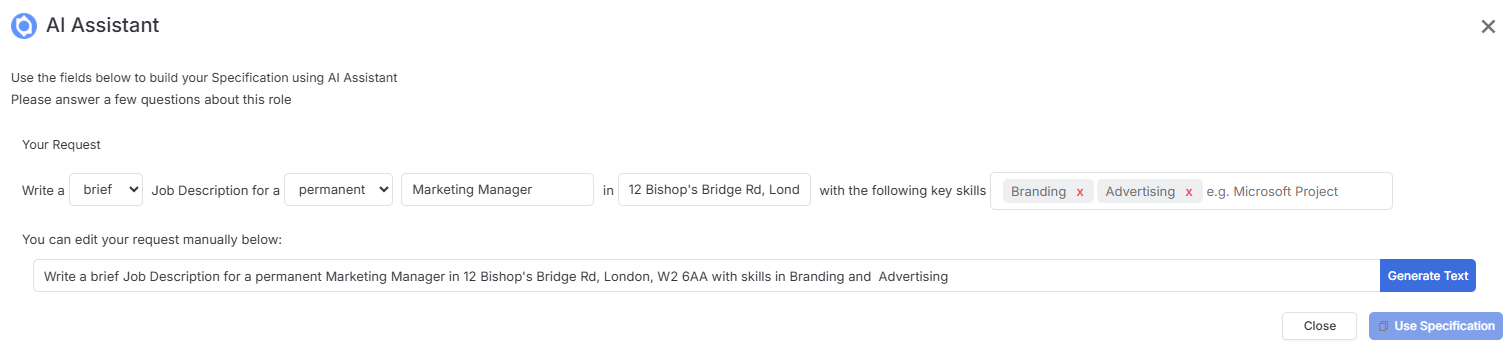
If you don’t have a job description from your client you can use the AI Assistant to write one for you. You can choose between a short, brief or full description, adding in additional key skills. If there is other data you wish to add, you can manually edit the request before generating the text.
Strategy/Commentary
This area is used for internal notes about the job, for example the approach you may take, thoughts about the role etc.
Location Details
These can be taken from the company record, or manually added.
Reason for status
This field records the reason a role was won or lost. It can be used as filter criteria when Finding job records (under the References & Score group), and populates the “Reason for Close” field in the Record Views.
Required Skills
If you add Skills to your job from your Quick Skills list these will be added to your Longlist Search under the Advanced Search area.
Dates & Fees
In the default layout the Dates & Fees tabs will house the Job Dates, Job Values, Placement Defaults, Job Lifecycle and Invoices blocks. Within these areas you can add in the start dates (for Temporary and Contract roles the start/end dates and if enabled in Tools & Settings | Job Settings the times), and input the financials related to the job.
Job Values
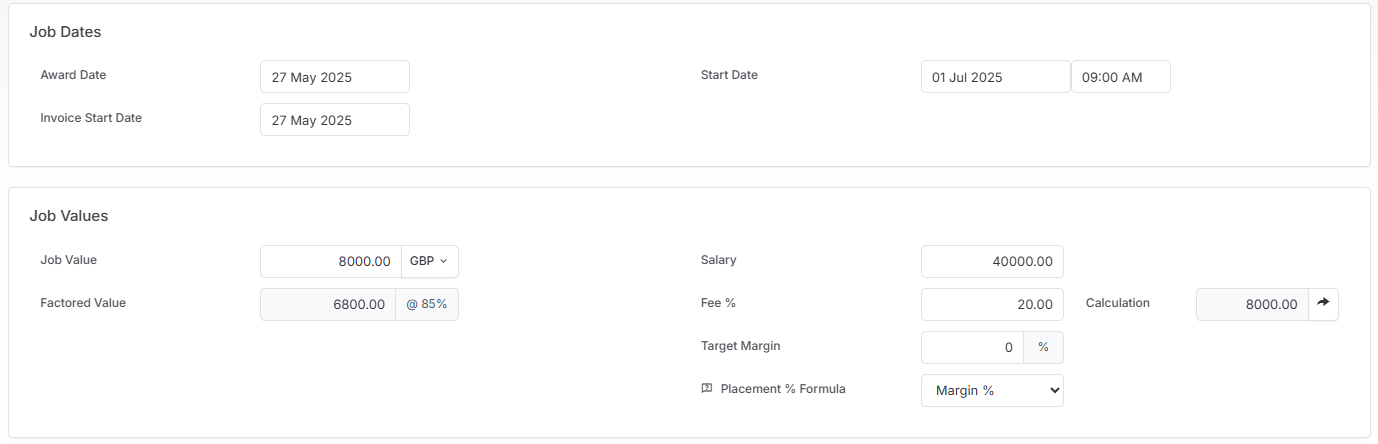
On a Permanent job after entering the Salary and Fee% you can use this to calculate the Value of the job.
Alternatively and on Temporary and Contract roles the value can be either manually added or calculated via a placement card and updated onto the job from their. Please see the article Placement Record for more details.
Below the Job Value field the Factored Value is linked to the Status of the job and probability linked to this, see the article Tools & Settings | Job Settings for more details .
Placement Defaults
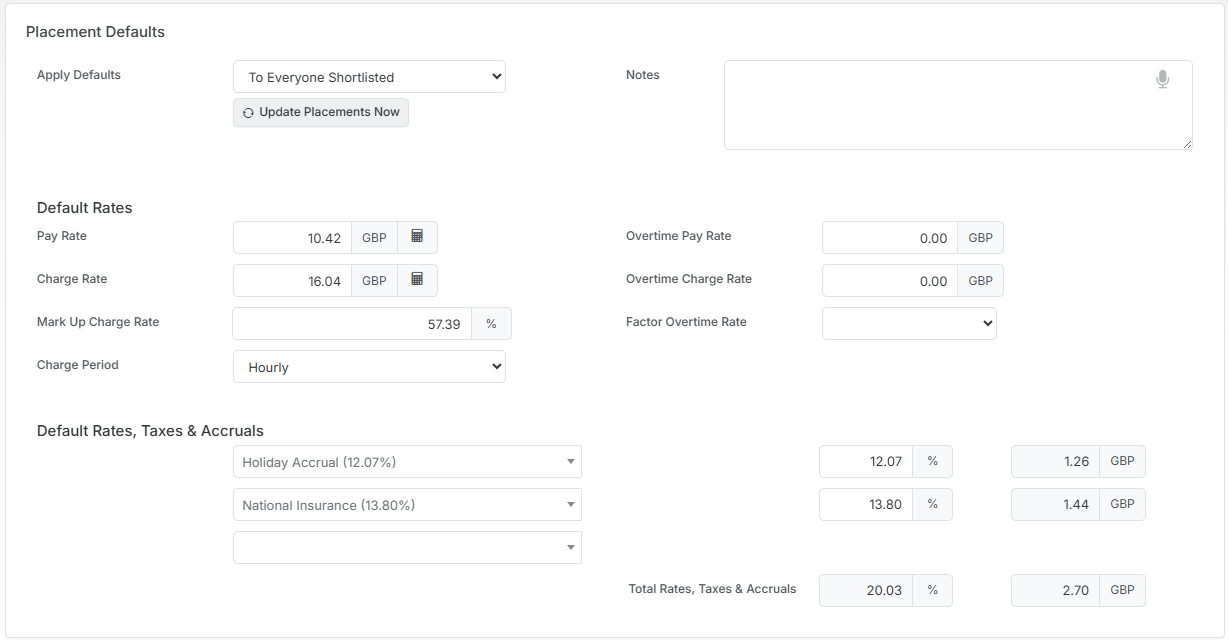
There are three areas to the Placement Defaults block: Placement Defaults, Default Rates and Default Rates, Taxes and Accruals, which work together as shown below. Use this functionality to inform the values added to the Job Values block.
This functionality is also available via the Placement cards, where it can be used in turn to update the Job Record. See the article Placement Record for more details.
Default Rates, Taxes and Accruals
- These are particularly useful for Contract and Temporary roles in helping you work out a Charge rate once Default Taxes and Accruals (such as Holiday Accrual and National Insurance payments) are accounted for by showing you the cost of those items. This way you can check to ensure you will be making a profit. Set these before applying the Rate Seek function and/or setting Pay and Charge rates under the Default Rates section.
- If you are raising Permanent invoices via itris a fee will need to be selected from Default Rates, Taxes and Accruals. This can be overwritten if required, and will be used when generating an invoice.
- Please see the article Tools & Settings | Application Settings for setting up these values.
Default Rates
This is where the default pay, charge and overtime rates for this job (as applicable) can be set.
- The Rate Seek (calculator icon) function assists you in setting the optimal Pay Rate or Charge/Bill Rate based on the Target % you are seeking to achieve. This will take into account the taxes and accruals you have set.
- Using on Pay Rate will adjust the Pay Rate field until the Target Actual Margin % is achieved.
- Using on Charge Rate will adjust the Charge Rate field until the Target Actual Margin % is achieved.
- Either manually enter Overtime Rates or use the Factor drop down list to calculate for you, e.g. 1.5 time.
- Set the Charge Period for the Job (e.g. on Temp) to either Hourly or Daily.
Apply Defaults
Placement Defaults allow you to set the standard pay/charge configurations that can be applied to all shortlisted or working candidates at the point of that action occurring, saving time by avoiding individual setup for each person.
The “Update Placements Now” button provides the option to apply these defaults after candidates have already been added to submissions, offering flexibility in when standardised settings are implemented later during the recruitment process.
Target Company List
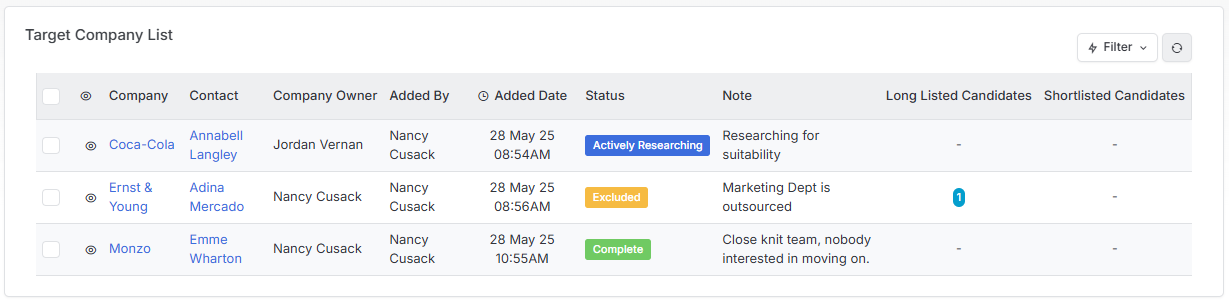
This area is primarily (but not exclusively) used for Retained/Executive Search roles whereby companies may be a Headhunting target. A company is added to this list via the Action Menu on the Company Record and the Add to Target Company List option.
Clicking on the company name in the list allows you to update the status and add notes. If a candidate linked to a contact record is either longlisted or shortlisted against the job this will also show.
See the article Job Record | Target Companies for more details.
Activities
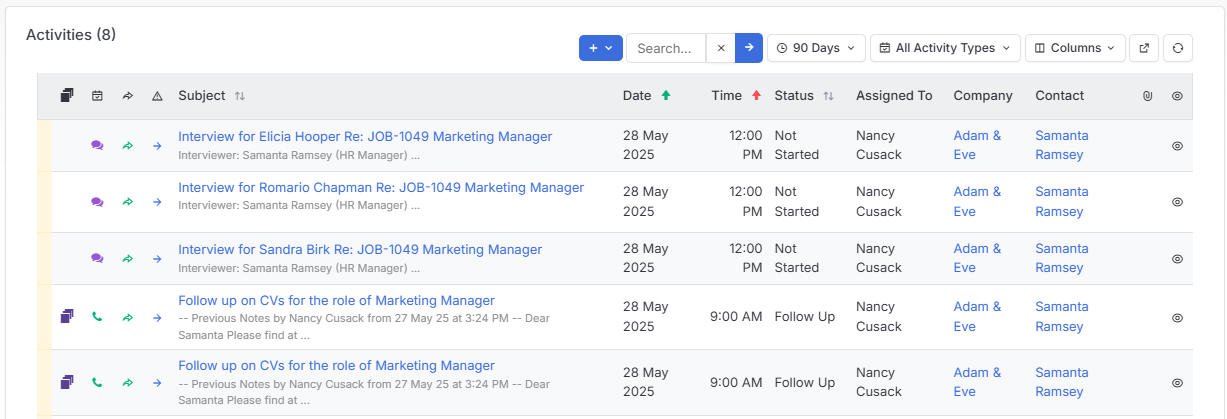
View automated and create activities against the Job record. See the Activities article for more information.
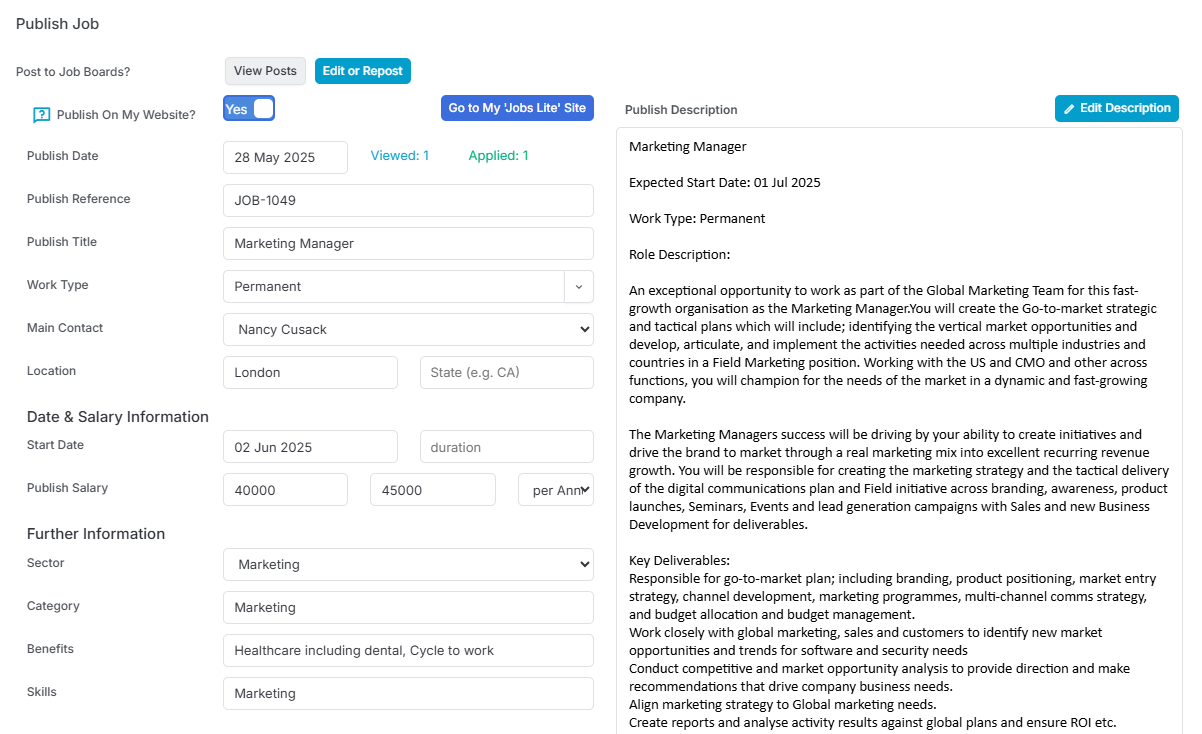
Job Posting
This area allows you complete the data required for externally publishing the job to your job, for example to your own website, or for Premium/Premium Plus licences, posting to job boards, and to your Jobs Lite site. Please see these articles for more information: Job Record | Job Board Posting and Job Record | Jobs Lite.
You can amend the job description text here if required or apply one of your Job Description Templates. Using these templates will ensure consistency, clarity, and a professional tone across all your job advertisements, helping maintain your employer brand, streamline the posting process, and make it easier for candidates to understand your expectations and company culture.
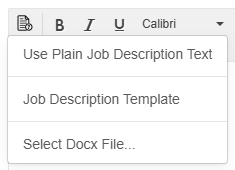
See the article Tools & Settings | Job Description Templates for more details on how to create these templates.
Posting your job externally, for example posting on your website, can be achieved via the Jobs Feed (for more technical details on the data provided in the Job Feed see the article Jobs Feed).
Additionally, you can use web links which allow Candidates to Register with you and Apply to a Job at the same time. See the article Portals | Candidate Registration and Job Application for details on how to do this.
For more details on Posting to Job Boards see the article Job Record | Job Board Posting.
Job Board Applicants
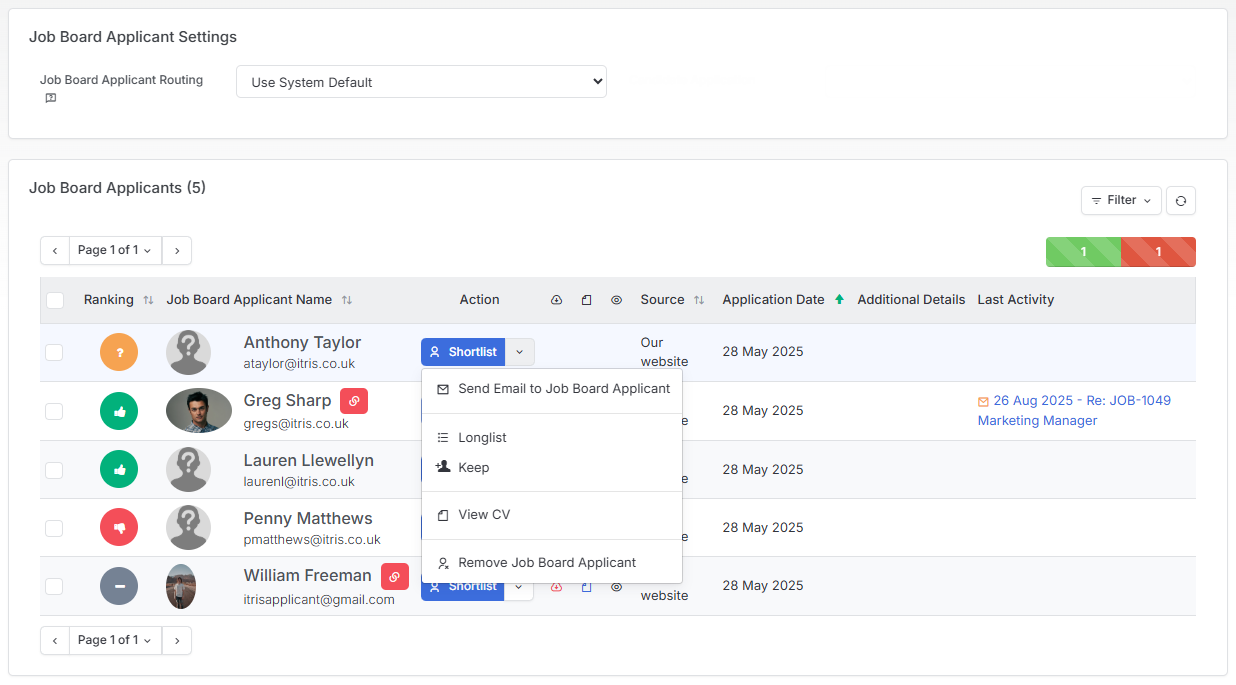
For users with the the Job Board posting module, any applications made via your Job Board postings will show here. These results will be deduplicated and ranked from top to bottom, clicking on the rank icon will allow you to Red, Amber, Green (RAG) flag them.
You can choose to view the applicants CV, Longlist or Shortlist the applicant, Keep them (aka add them to itris but not progress the submission), or remove them from the tab. If itris recognises the candidate may exist as a record you will also be alerted by the link icon.
Additionally, via the Job Board Applicant Settings block you can override the system setting which controls what happens to candidates who apply via job boards. See the article Job Record | Job Board Posting Posting for more details.
Longlist
This area is used to search itris job boards for relevant candidates. See the article Job Record | Longlists for more details.
Submissions
This area is used to manage candidates through the submissions process. See the article Job Record | Submissions for more details.
Documents & Notes
In this area you can store job descriptions and any other documents related to the job record. See the Documents article for further details on this area.
Additionally, you can add Notes to the job, these are searchable via Find Records (Searching).
Finance
Invoices
itris can generate invoices for Permanent placements or other Job Products and Services (for example staged payments for Retained/Executive Search roles).

Once created invoices can be emailed, printed, reported on, marked as paid.
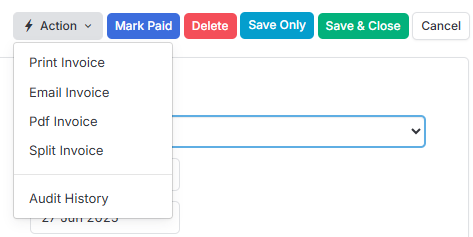
Invoices can also be managed via the Invoices area under the Menu Bar, see the Invoices article for more details.
Products & Services
Products & Services can be created to use on jobs, for example for raising quote and applied to invoices.
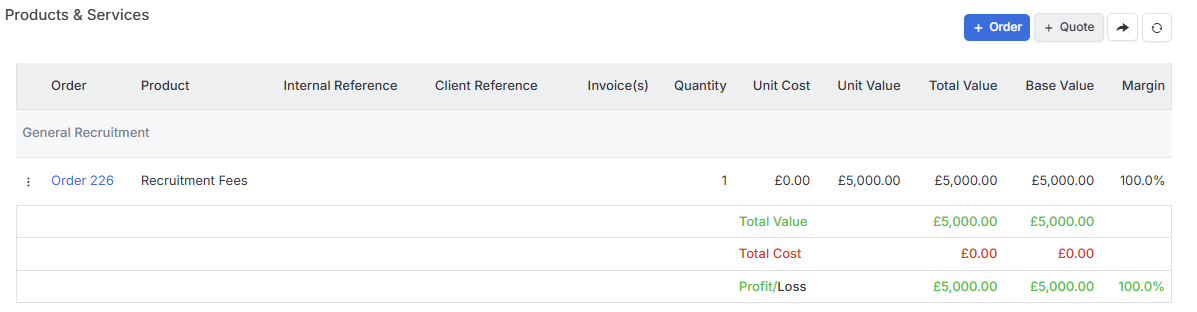
When creating Products & Services these can be split across months, for example to show the value of a Fixed Term contract across each month.
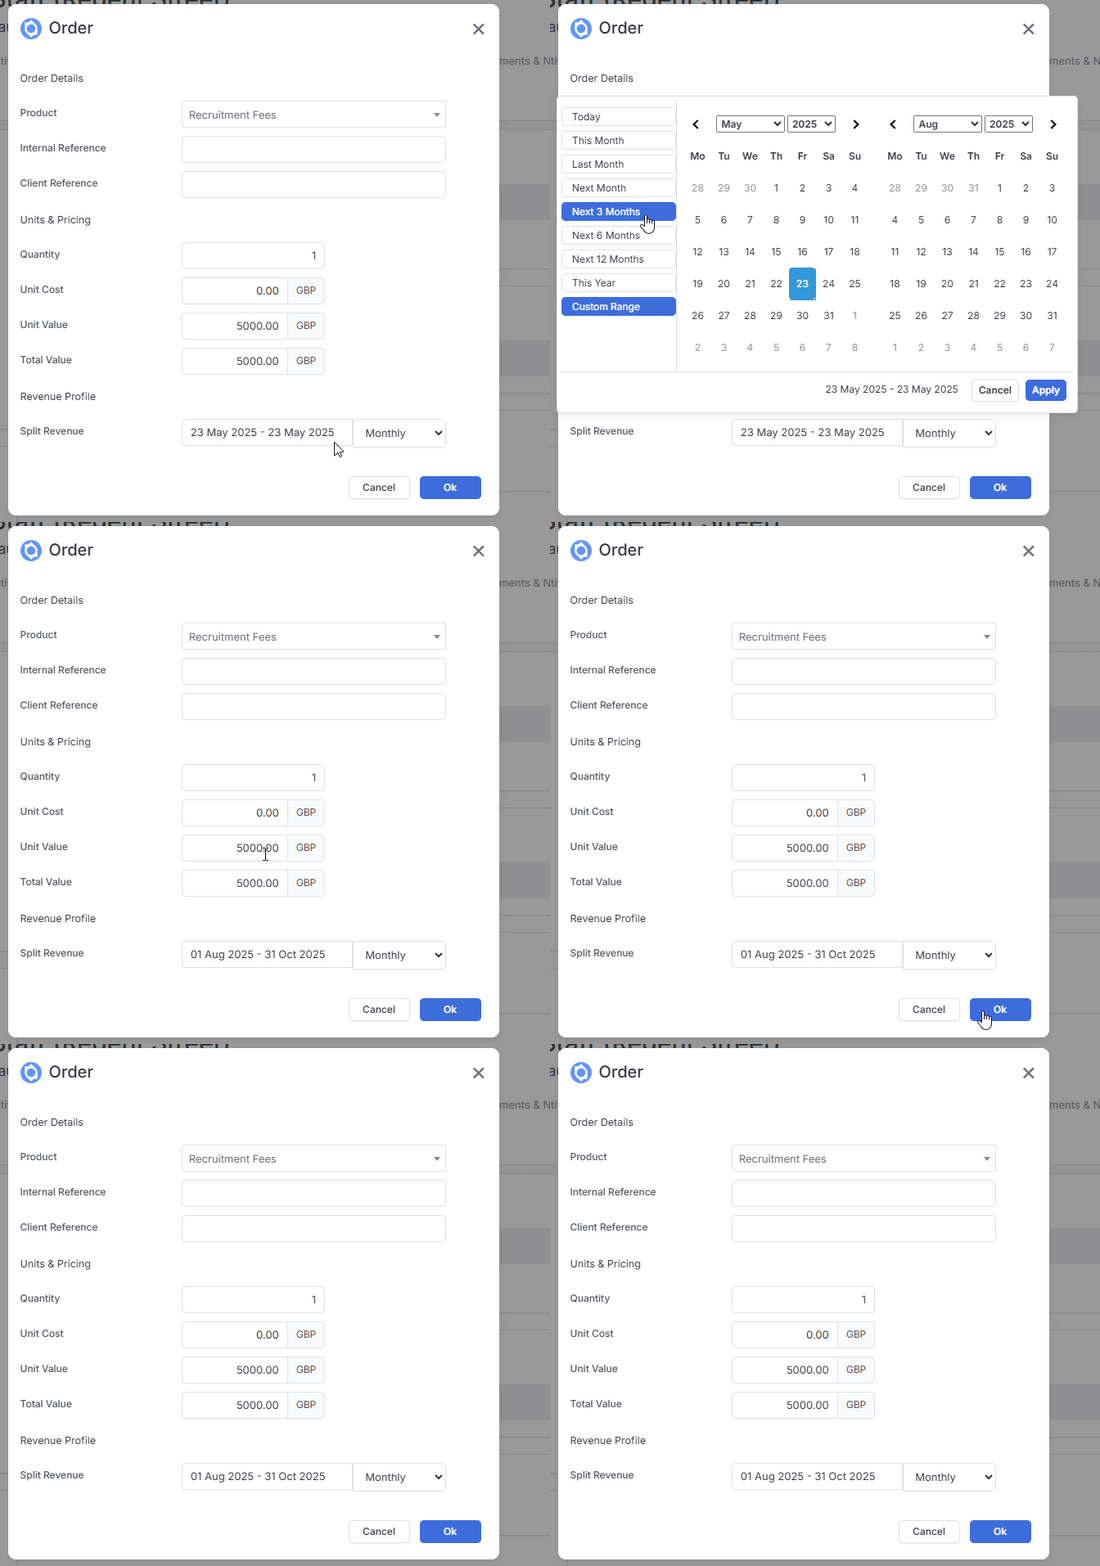
Please see the following article for more details: Tools & Settings | Products & Services.
Revenue
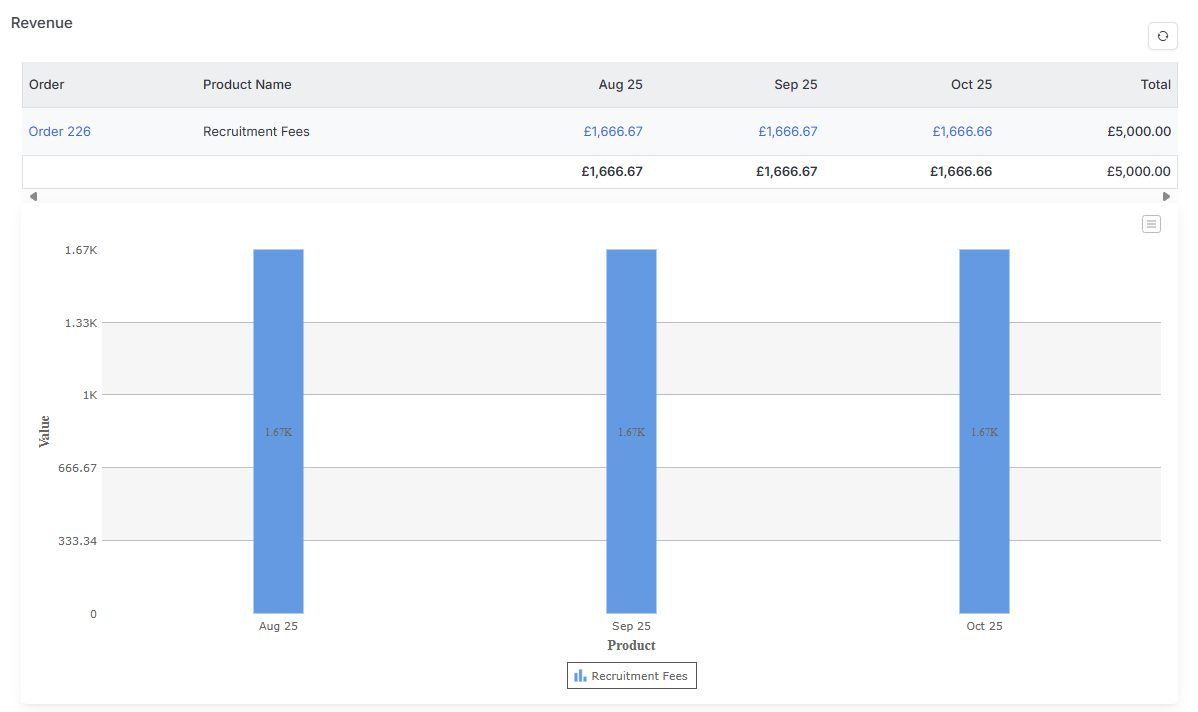
Values from Products & Services raised against the job will be displayed here and will show against the relevant months (for example if split as described above).
Other
Record Links
Custom Fields linked to Job Records will create bidirectional connections - the Job Record will show which record it’s linked from.
Compliance Sets
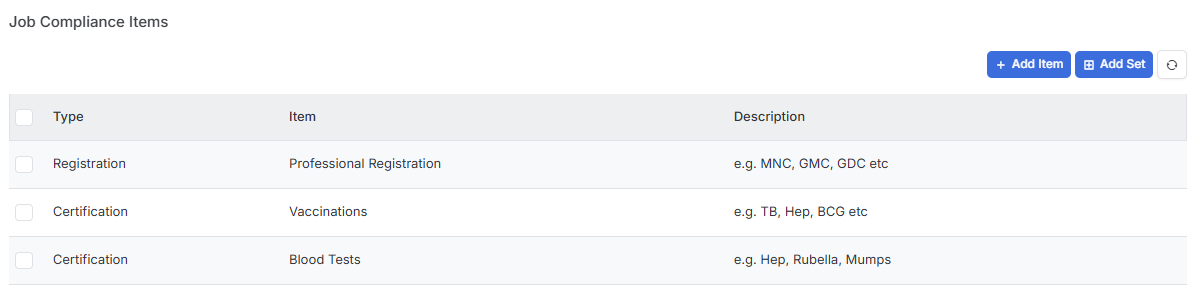
Where Candidate Compliance may be a requirement of working the job these can be set here, which in turn filter to the Placement Record. Compliance Items can be added individually or as part of a Compliance Set.
For more details on creating Compliance sets see the Tools & Settings | Candidate Settings article.
For more detail on viewing compliance on Placement Records see the article Placement Record.