
Introduction
The submissions area contains the Shortlist block where candidates can be managed and tracked through the submissions workflow.
Due to itris being highly customisable, the order and name of the tabs, and the placement of the record blocks may differ to those shown in this article.
Typically, candidates progression to submissions from the Job’s Longlist, see the article Job Record | Longlist for more information. For the different options for Shortlisting candidates see the article Longlisting & Shortlisting.
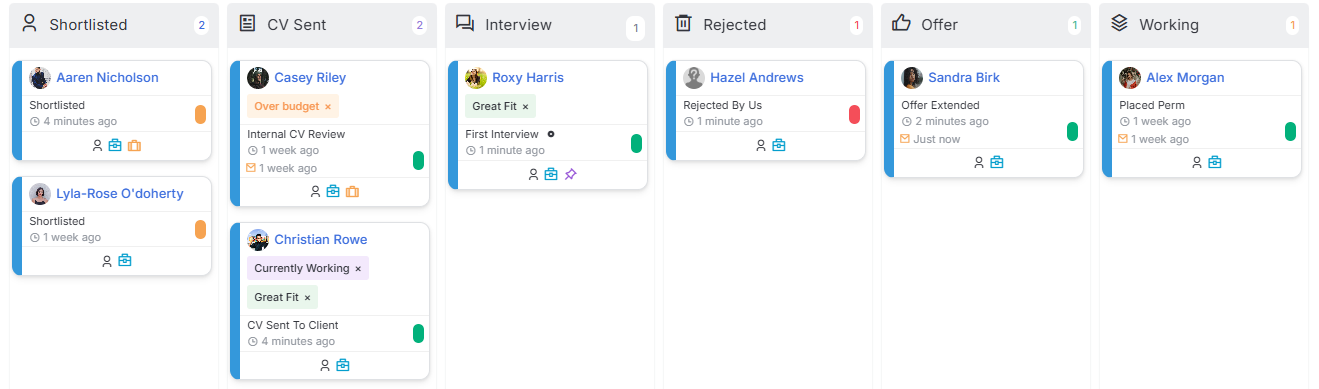
Candidates enter the submission workflow at Shortlist stage and can be progressed or relegated to the different levels are necessary. This movement can be via dragging and dropping the submission cards between the stages, via the drop down menu (for CV Sends & Interviews) or via the Shortlist Record.
Shortlist Buttons
At the top of the block are a few action buttons:

Quick Add Candidates allows you to find candidates by name one at a time to add to the Longlist.
List/Card views will present the shortlist block in either a List view or the Card (kanban) view as shown above.
Map View allows you to plot the candidates on a map. Clicking the icon on the map will highlight the results on the list to the right, clicking a results on the right will cause the corresponding icon on the map to jump. Above the map will be a button “List” to return to the list view.
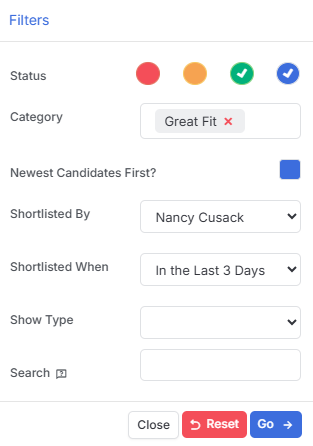
Filter give you various options, including filtering the list by the Red, Amber, Green (RAG) statuses and Category; for example to find best candidates to progress to the next submission level.
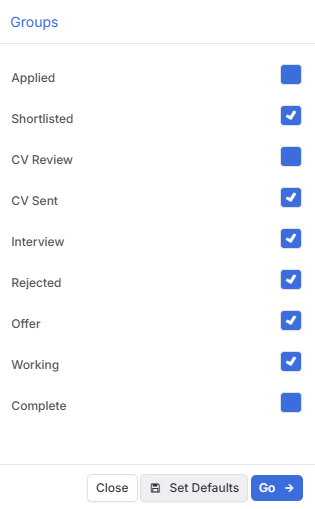
- Groups allows you to choose which stages of the submission workflow you want represented on your board. The applied group will be relevant for applications via your own website. The applied group will be relevant for applications via Jobs Lite or your own website.
- Refresh the list, for example perhaps activity has been completed by another user whilst you are viewing the area.
Submission Cards
If you are working in the Card (Kanban) view you will have cards for each candidate, and these display a number of details beyond their profile picture, name and submission level.
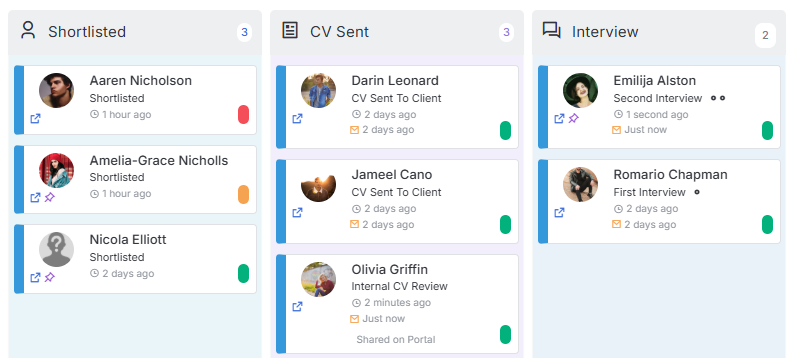
There is an option in the bottom left to open the candidate record (on the tab that you are in).
If the candidate has a Tag on their record the pin icon will show in the bottom left, hovering over this will display the tag text
The colour icon on the bottom right will show the Red, Amber, Green (RAG) flag.
The exact submission status will show under the candidates name, for example, under CV Sent this might be CV Sent to Client or Internal CV review, and Under Interview it will show the Interview Number. With the later there will be a corresponding number of dots afterward, for example 2 dots equals 2nd Interview.
When the candidate reached that submission stage will be displayed, and if emails have been sent for CV Sends/Interviews this will be indicated below the date.
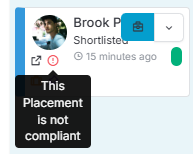
Where compliance is set on the Job, and if you have working/offer prevention levels set for compliance (see Tools & Settings | Placement Settings), an indicator will show on the candidates submission card when they are non-compliant.
Submission Cards Hover Actions
Hovering over the submission card gives you the option to open the Shortlist Record - this will open in a pop out on the right of your screen.
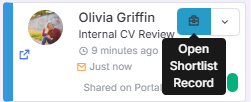
Additionally, you get a drop down menu.
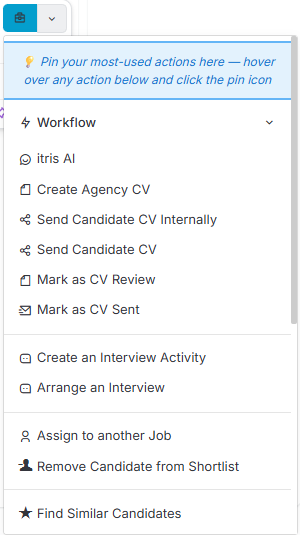
From this menu you have various actions can be performed, including but not limited to:
Creating Agency CV’s
Progressing to CV Sent, Interview etc
Removing from list
Logging an Activity
Opening the Record or CV
Emailing the candidate - here, clicking the plus icon at the end of the Attach field will show any document attached to the job (e.g. the Job Description) or allow you to attach from your Document Library.
Pin up to your ten most-used actions to the top of the menu, keeping them front and centre for quick access. A small change that makes a big difference to your daily efficiency.
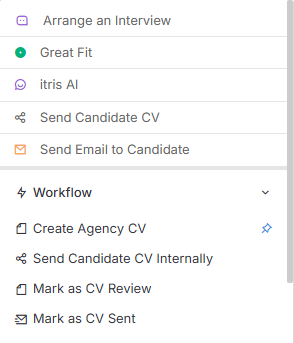
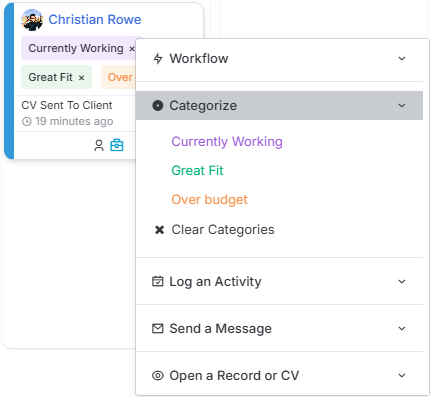
Categorising the candidate - flag each candidate with one or more categories to provide more information about the submission at a glance. The three most recently added categories are visible on the card, with an option to expand to see more if added. Categories are fully filterable for more granular organisation.
Progression Routes
As mentioned above, progression between the submission stages can occur via dragging and dropping the submission cards between the stages, via the drop down menu (for CV Sends & Interviews) or via the Shortlist Record. This can be to progress forwards, or relegation.
Drag and Drop
You can drag and drop to any stage, and this can be individually or in bulk. For the latter you can click on the image on the Submissions card to select multiple before dragging and dropping.
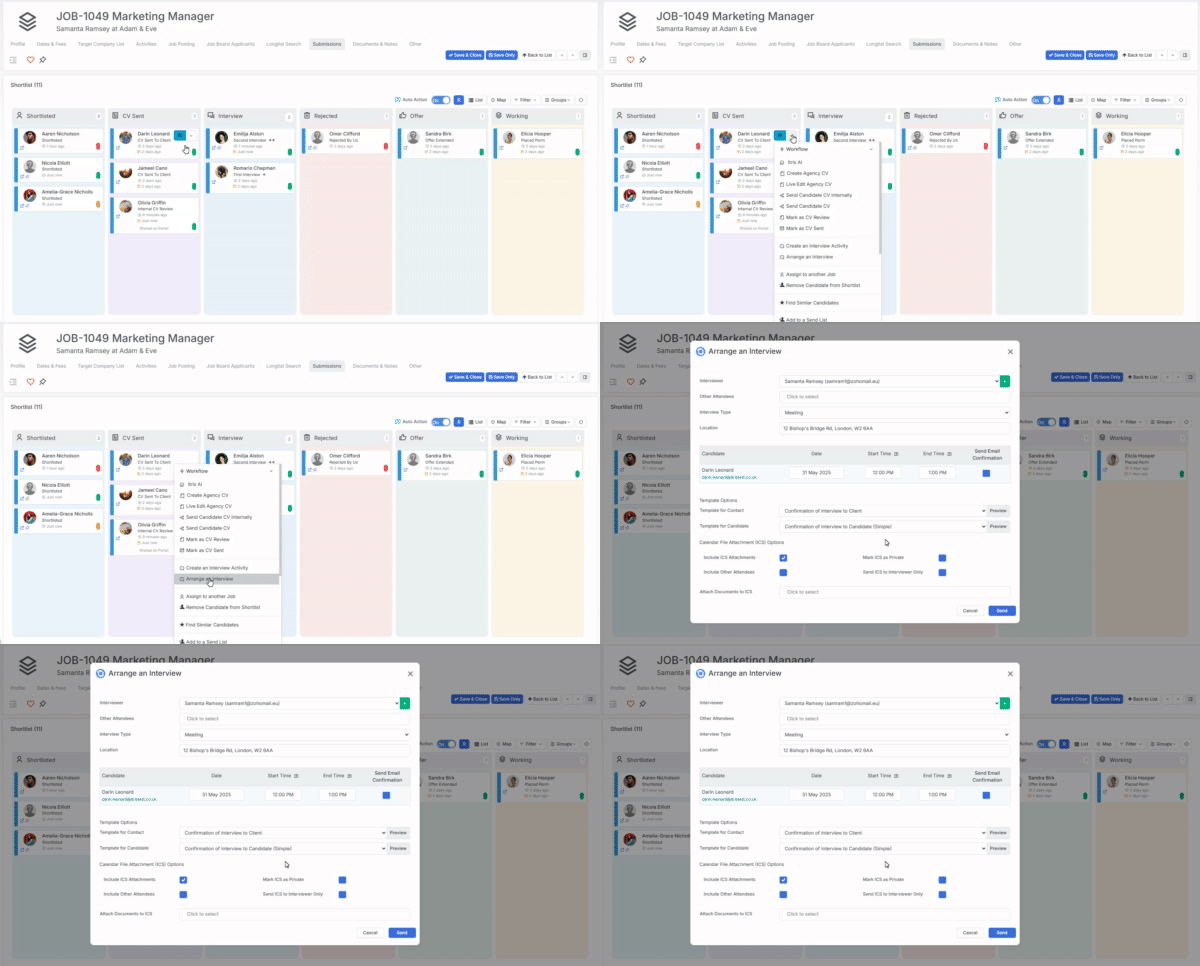
Drop Down Menu
For Sending CV’s (both internally and to client), arranging an upcoming interview or recording a previously occurred Interview activity you can use the drop down menu.
Shortlist/Placement Record
When a candidate gets Shortlisted for a role, they automatically receive a Shortlist or Placement Record that becomes their dedicated tracking hub throughout the entire submission process. From initial interviews right through to the final hiring decision, every step of their journey is documented and easily accessible in this single, centralized location.
The Shortlist/Placement Record is opened via the icon on the shortlist card.
From here you can change the submission status. This won’t initiate an action such as an email to the client/candidate for CV Sends/Interviews etc, if using this option and you want to create such an action this would then need to be initiated from the drop down Action Menu options.
You can also add a Status note, used to best describes the reason for the move to that submission stage.
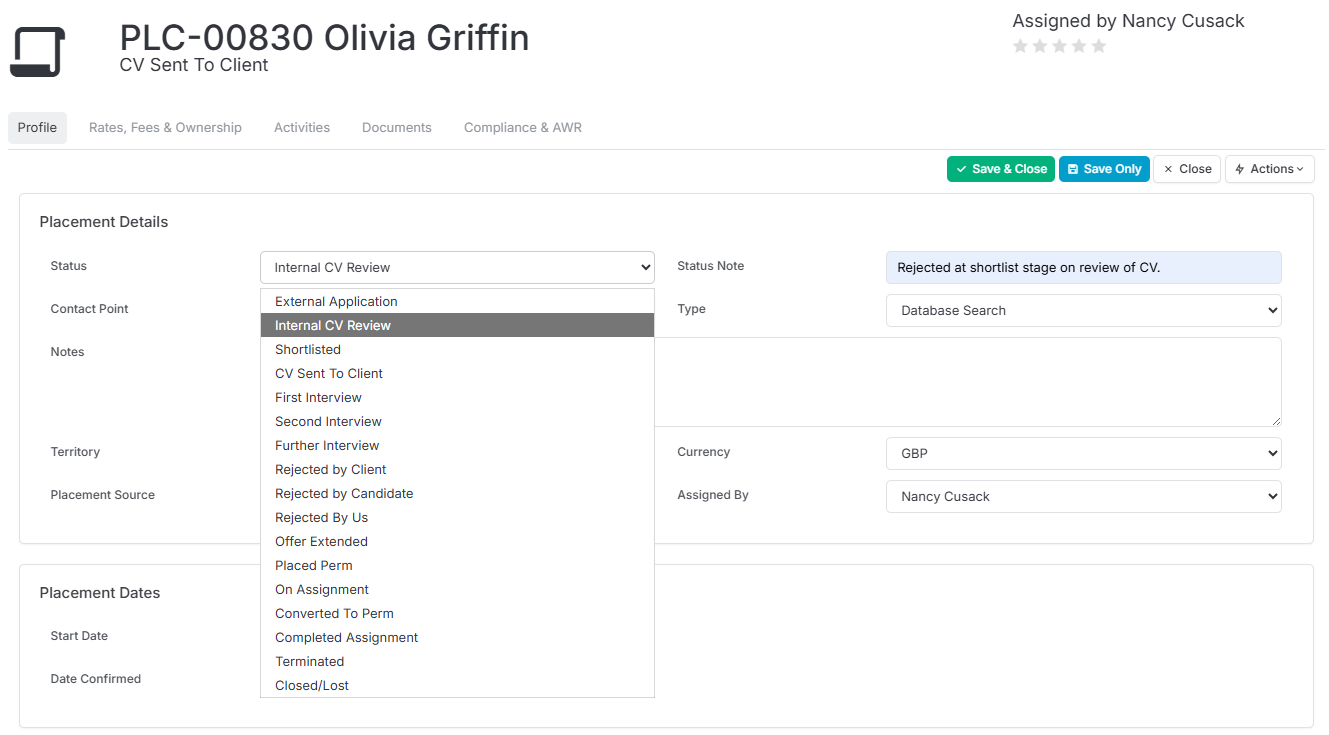
There are a number of other fields on the Shortlist/Placement record you can edit such as dates and rates, these will be used when the final placement is made, alternatively these can be added at placement stage. For more in-depth look at the this record type, including AWR and Compliance, see the article Placement Record.
Action Menu
Update Values
Within the Shortlist/Placement Card there is an action menu, with many similar actions to that as the Action Button that appears above the Kanban when submission cards are selected (see below). One additional option in the Action Menu of the Shortlist Cards is Update Values which can be used to update the Value field on the Job record with the values from this shortlist card, for instance if you have added a different salary here as opposed to on the job record itself.
Find Similar Candidates
Another option within this action menu is to find similar candidates to the one linked to this Shortlist Card. See the article Longlisting & Shortlisting for further details.
Action Button
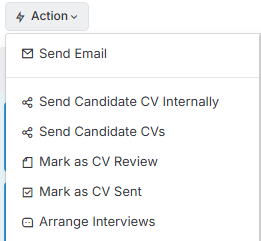
Candidates can be progressed in bulk for CV Sends and Interviews by ticking their image. Once images are ticked the Action Menu will appear. There are additional options here beyond submission stages such as sending emails, bulk updating, assigning to another job and more.
Quick Approve & Reject
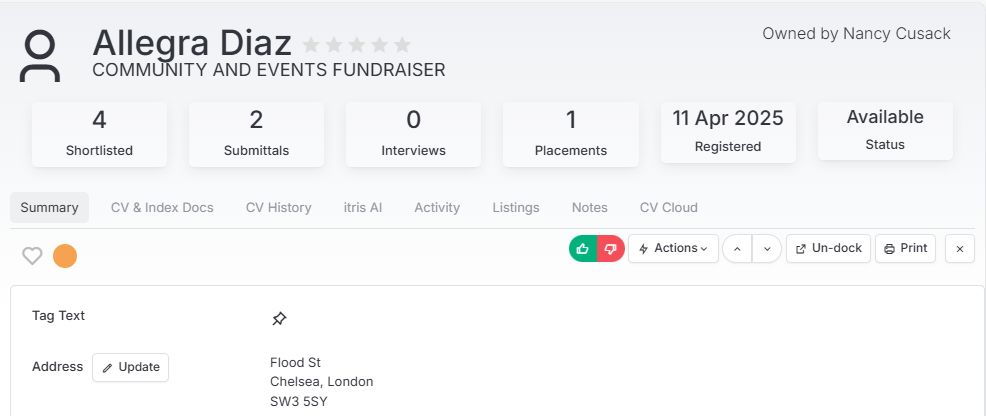
Clicking on a candidate’s name in their shortlist/placement card within the Applied or Shortlist Groups opens a Quick View of the Candidate and reveals Thumbs Up and Thumbs Down buttons, which can be used to update their submission stage. If you don’t see these Status Groups see the Shortlist section above.
Clicking Thumbs Up (accept) when a candidate is at the Applied stage will give them the green status flag and move them to the status specified in Tools & Settings, for example Shortlisted.
Clicking the Thumbs Down (reject) for either Applied or Shortlisted candidates will give them the red status flag and move them to the status specified in Tools & Settings, for example Rejected.
For further details on specifying the Accept and Reject statuses see the article Tools & Settings | Placement Settings
Workflow
itris AI > Evaluate with itris AI
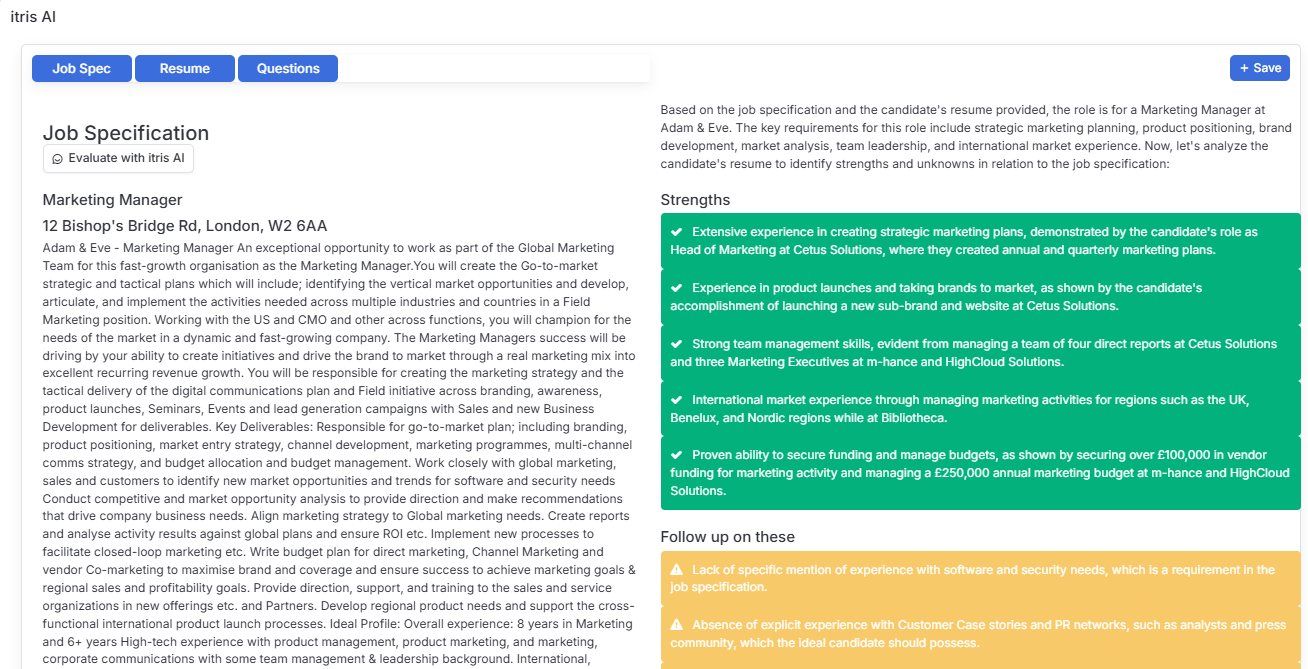
The top option under the drop down button is itris AI, this opens the Quick View of the Candidate on the itris AI tab (you can also navigate to here via direct via Quick View too).
Via the Job Spec or Resume buttons you have “Evaluate with itris AI”, this will highlight the candidates strengths and weakness specifically against the job spec. There is an option to save this as an Activity against the Candidate record, to be revisited at any time.
Agency CV
An Agency CV can be created at any stage of the submission workflow, or perhaps beforehand via the candidates record. Please see the article Agency CVs for more details
Internal CV Review
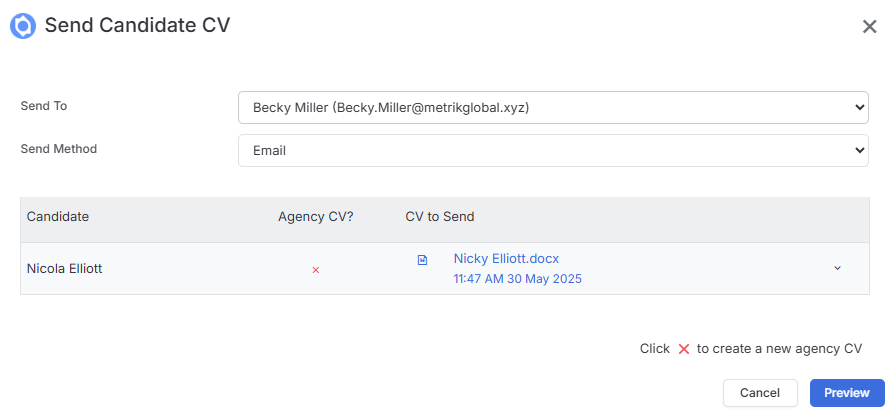
If you have an internal review process for CV Submissions, for example a Resourcer sending the CV to a Consultant to review before it is sent to the client, then you can choose to Send Candidate CV Internally. You can pick who to send the CV to, by which method and whether to send their original CV or (create) an Agency CV.
Submitting CVs by email
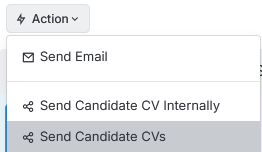
As mentioned above, submissions can be made individually or in bulk. If actioning in bulk you will need to click the candidate images to select them first and via the Action Button choose Send Candidate CVs.
In the Send Candidate CVs window you can change the contact you are sending the CV’s to, change the Method (for example to mark that CVs have been submitted online), and choose a different version of the Agency CV is the candidate has more than one.
If any of the candidates don’t have an Agency CV you will be required to create one to continue the submission. See the article Agency CVs for more details.
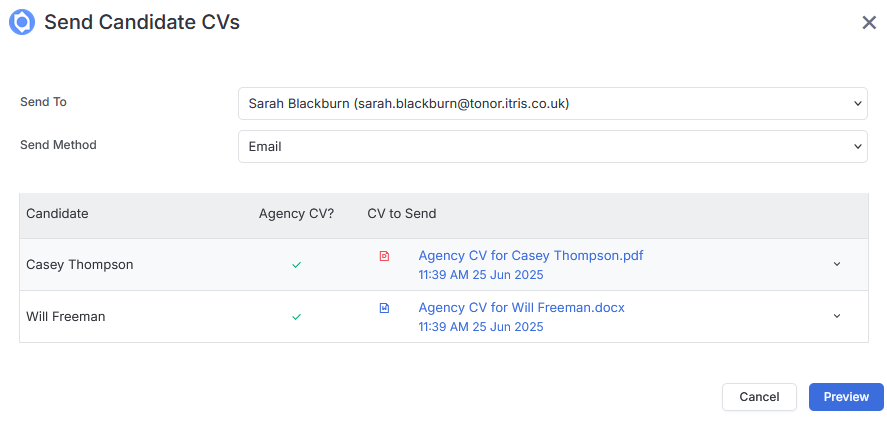
To continue you will need to Preview the email before sending it. If set to do so in Tools & Settings | Placement Settings the email will be prepopulated with a template. You can change or edit this template before sending. You will also be able to add further recipients, links, add follow ups, add or amend workflow auto update actions and more before sending, including choosing to Send Later.
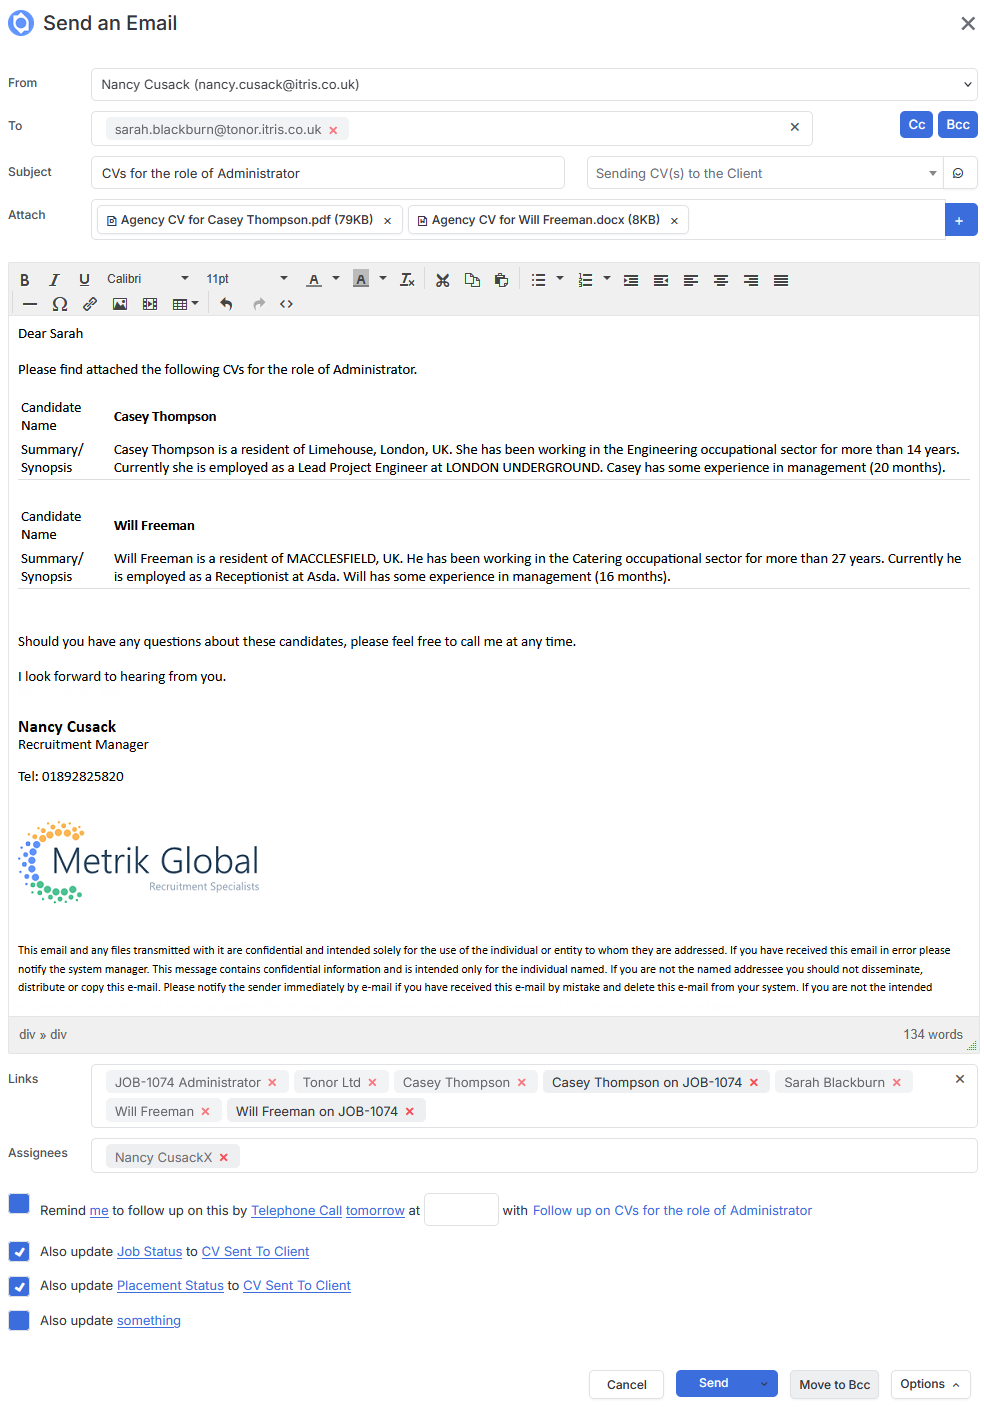
Mark as CV Sent
If the CV is not being submitted via itris, for example you’re uploading to a client’s portal, then the option (under the Action menu) “Mark CV as Sent” can be used.
Interview Confirmation
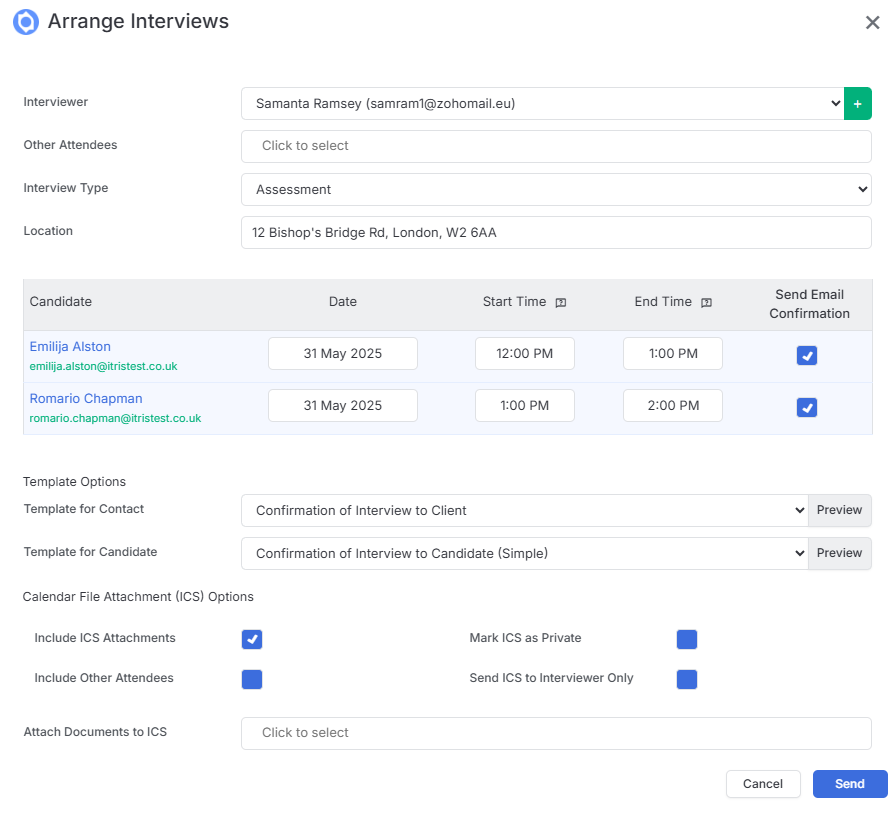
Whether one or more interviews are being created at the same time the Arrange Interviews window will allow you to select the dates and times and choose which to send confirmation emails for. Additionally you can choose email templates for both Candidate and Contact confirmations. Including and ICS attachment will include a meeting appointment the recipient to use to add to their calendar.
Update Placement Status
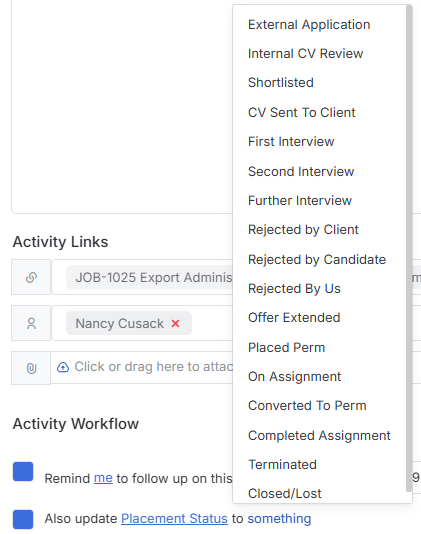
As mentioned in the Submitting CV’s by email section above, activities within the submissions process can create update actions, one of those actions can be to Update the Placement Status. These actions may be associated with an email template or an activity, examples include: sending a CV Internally, offer confirmation emails, creating an Interview Activity (rather than Arrange an Interview which will update the status automatically) or simply logging an activity such as a call.
When performing the above you will have the option to Update Something, under which you have the option to update the Placement Status. You can then choose what to update that status to.
Making a Placement
In the same way a candidate can be progressed through all the submission stages as covered above, the candidate can be placed into the job.
For more details on making a placement and the placement record please see the article Placement Record.
Other Routes to Shortlisting
In addition to the ways to generate a Shortlist mentioned above and in the Job Record | Longlists article there are other routes to shortlisting candidates. See Longlisting & Shortlisting article for more details.