
Introduction
Managing invoices in itris is straightforward once you know where to find everything. Whether you’re creating new invoices, applying discounts, or tracking payments, the system gives you plenty of flexibility to handle your billing needs efficiently.
This flexible approach to invoice management in itris ensures you can handle everything from simple one-off invoices to complex bulk operations with ease.
If you are integrating itris with an accounting software, please see the relevant Integrations article for details on specific workflows related to that integration.
Due to itris being highly customisable, the order and name of the tabs, and the placement of the record blocks may differ to those shown in this article.
Creating Invoices
Getting started with invoices is simple. You’ll find the invoice functionality right where you’d expect it - in your job records. Just head to the invoices block (under the Financials tab in the default layout) and click that handy plus button, or if you prefer using the action menu, select New Invoice.

Invoices can also be added via the Invoices block (typically under the Financial tab) of a Company Record.
Once you’re in the invoice creation process, you’ll need to choose the relevant contact for your invoice. Keep in mind that raising invoices is permission-based, so make sure you have the right access level to create them.
When you’re working in the invoice form, itris does a lot of the heavy lifting for you. If you’ve set up defaults on the company record, these will automatically populate fields like dates, templates, contacts, and any discount or surcharge information. This saves you time and ensures consistency across your invoicing.
If you need to make changes to any line item, simply click on the description and you can edit it directly.
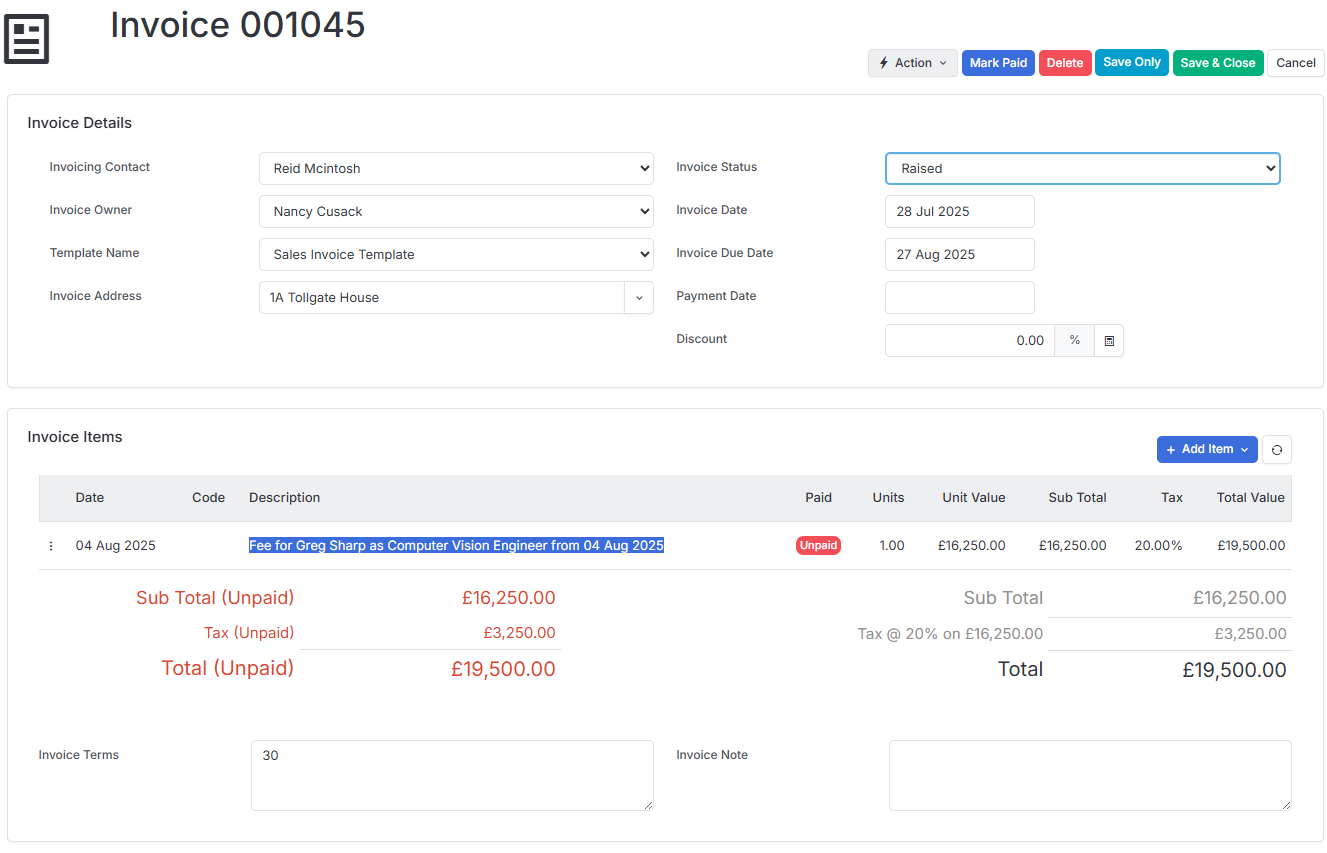
You have several options for adding content to your invoice:
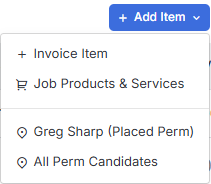
- Invoice Items - These let you add Products & Services (as set in Tools & Settings | Products & Services that haven’t been previously added to the job, essentially bypassing the usual product addition step. You can modify values as needed.
- Products already added to the job - The tax rates will be pulled directly from a Product & Service added to the job, see the Job Record article.
- Permanent placements that are associated with the job.
- Discounts and surcharges - Don’t forget to use the calculate button to apply these properly (see below).
Understanding Discounts and Surcharges
One of the really useful features in itris is the ability to set up automatic discounts and surcharges at the client level. Once you’ve configured these, they’ll automatically apply to any invoices you raise for those specific clients - no need to remember to add them manually each time.
You can set up these automatic discount and surcharge details in the Invoicing Details section of your company record, see the Company Record article for more details.

Where these are not set on a company record you can manually add to the Discount field, using the calculator button to apply to invoice items, or use Products and Services to apply a discount.
Using Products & Services for Discount or Credit Items
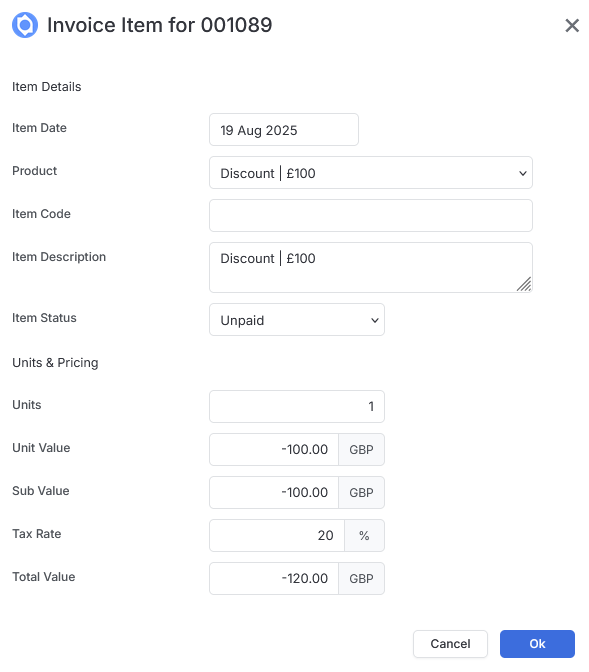
Sometimes you’ll need to add a discount or credit to an existing invoice. These can be created as either Products and Services with negative Values or via adding an Invoice Item and applying negative values.
The key thing to remember is making sure the value you’re adding is negative to properly reflect the discount or credit.
Working with Split Payment Profiles
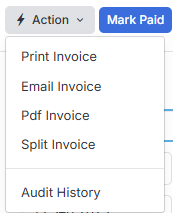
If you need to apply a split payment profile to an existing invoice, itris makes this process quite manageable. Open your invoice using the invoice number, go to the Action button, and select Split Invoice.
You’ll then tick which invoice items you want to split and under “Invoice Profile to apply” chose the relevant profile. Invoice Profiles are managed in Tools & Settings | Invoice Settings.
For example, if you’re dealing 50/50 split invoice, the system will show you both the original invoice and create a new invoice for the remaining amount.
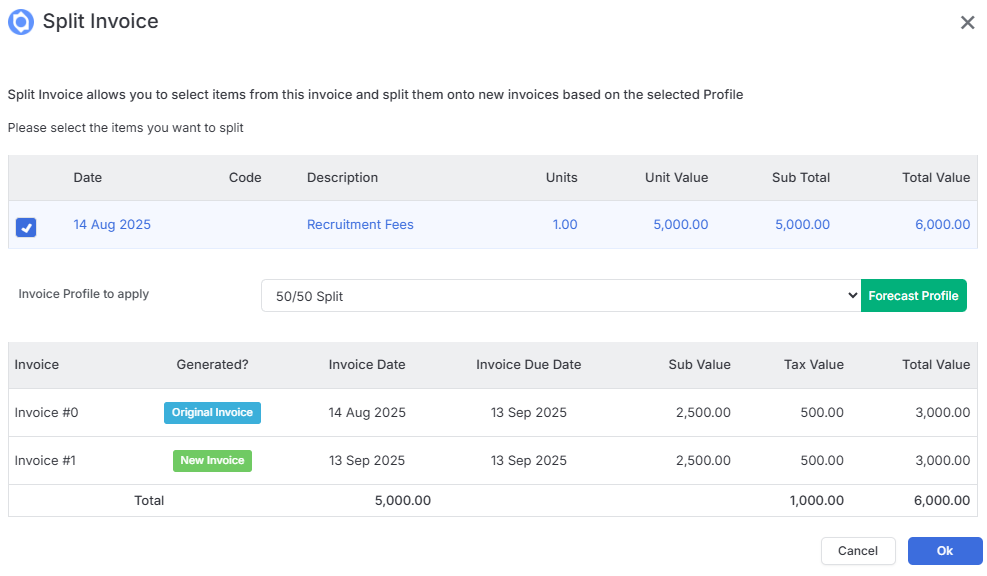
After you save and close the invoice, you’ll see both the current invoice and the new one.

Invoice Taxation Features
itris supports multiple taxation rates, which gives you great flexibility when dealing with different types of services or clients. You can enter individual tax rate percentages against each line item in your invoice, and this will be properly reflected in the final invoice calculation.
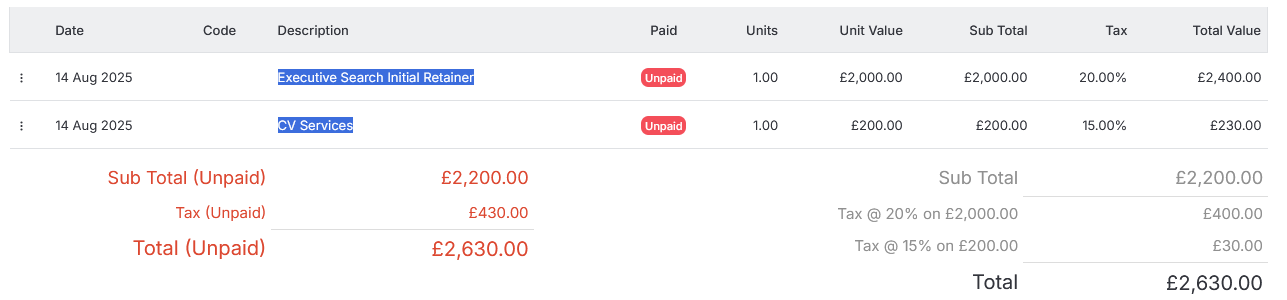
How Tax Rounding Works in itris
itris calculates tax on the total value of taxable invoice items. Here’s how the rounding works:
Precision Rules:
- Unit values: 4 decimal places
- Sub values: 2 decimal places
- Standard rounding: 0.5 and above rounds up, below 0.5 rounds down
Important: If you enter unit values, your numbers may be rounded twice before tax is applied:
- First when converting unit value to sub value (rounded to 2 decimal places)
- Then when calculating tax on that rounded sub value
This means the final tax amount depends on these rounded values, not your original numbers.
| Input Unit Value (input with 8 places) | Saved Unit Value (rounded to 4 places) | Sub Value | Saved Line Amount (rounded to 2 places) | Calculated Tax (where tax rate = 12%) |
|---|---|---|---|---|
| 37.37499999 | 37.3750 | 37.3750000 (calculated) | 37.38 | 4.49 |
| 37.37499999 (input directly) | 37.37 | 4.48 |
Editing Invoices
Once an invoice has been raised, you can open the invoice to edit it by clicking on the invoice number. This is whether you’re viewing from Job or Company record, or from the Invoices area.
Part Payment
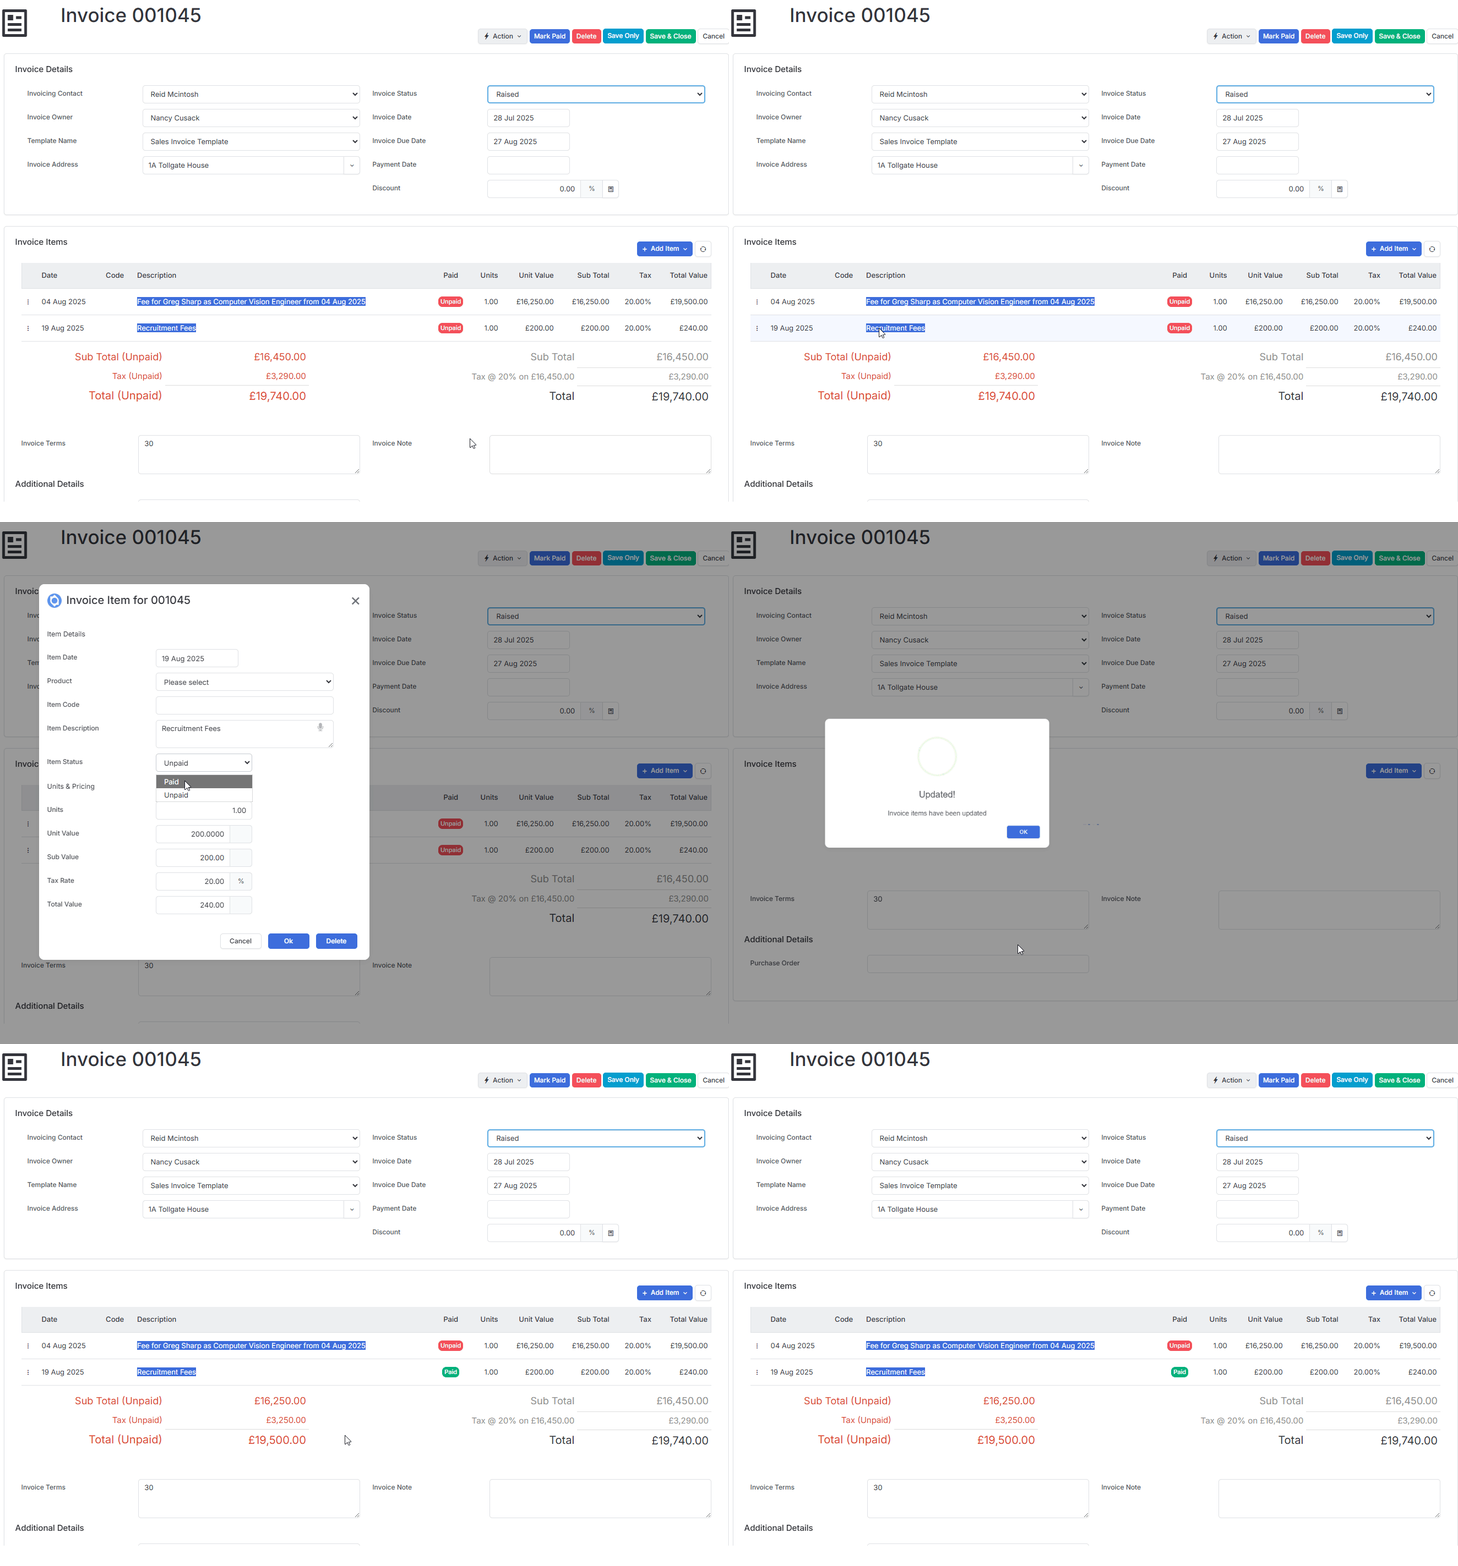
If a client pays part of an invoice, for example where you have two placements on one invoice and they pay just one of those, you can edit the invoice line item to show that part was paid. There are columns available on the list that will show part and outstanding payments.
To mark an individual item on an invoice as paid you will need to edit the invoice > select the line item and change the status of that to paid.
Email, Print, PDF Invoices
Individual invoices can be Printed, Emailed, or a PDF created via the Action menu within the invoice form.
If you wish to produce an invoice document (e.g. to email, print or PDF) Invoice Templates will need to be created in Tools & Settings | Standard Templates. Typically these will be created under the Type “Letter”, with the Association and System Template settings set to Invoice.

Invoices Area
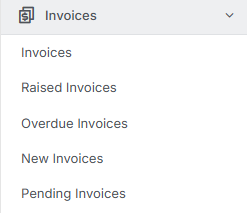
You can access the invoices area through the main menu where you can view all invoices or by Status.
Below the dashboard, you’ll see your complete list of invoices. You can use the columns and filters to view exactly the data you need. There’s also a handy Select button that calculates the total invoice value of any invoices you’ve selected, and you can export your data to Excel (page by page).
Once an invoice is raised it will show here, you can click on the invoice number to view and edit that invoice, including applying actions such as part payment, adding additional items etc.
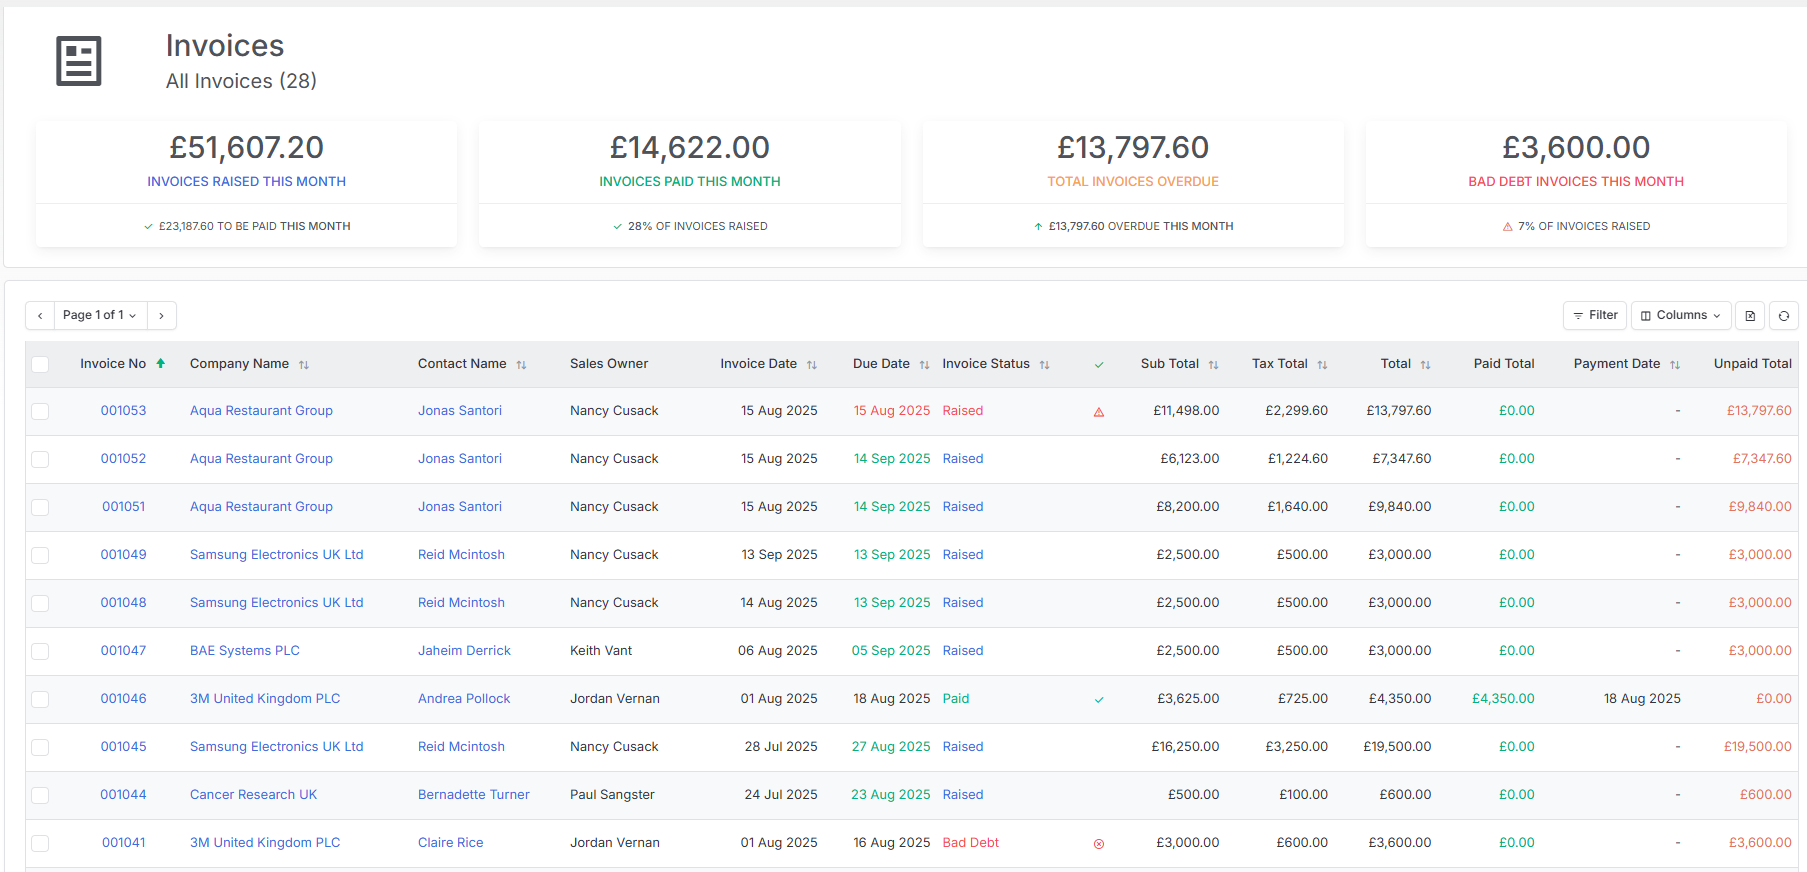
When selecting invoices, in addition to the Action button (see below) a total of the selected invoices will display on top right next to the filter, columns and export buttons. This might be particularly useful if a client sends in one remittance that covers multiple invoices to identify which ones have been paid.

Dashboard
At the top of the Invoices area, you’ll find the invoice dashboard, which provides a quick overview of the month showing invoices Raised, Paid, Overdue, and those that have unfortunately turned into Bad Debt ). Your default currency will be applied here automatically.

Invoice Actions
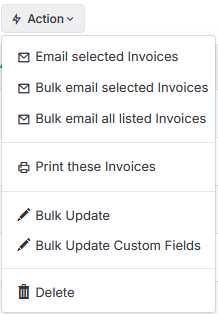
When selecting one or more invoices in the list the Action button will appear allowing you to Email, Print, Delete and Update invoices.
Note, if you are integrating with an accounting package this action button may include additional actions for Sending and Syncing with your accounts system.
Email Invoices
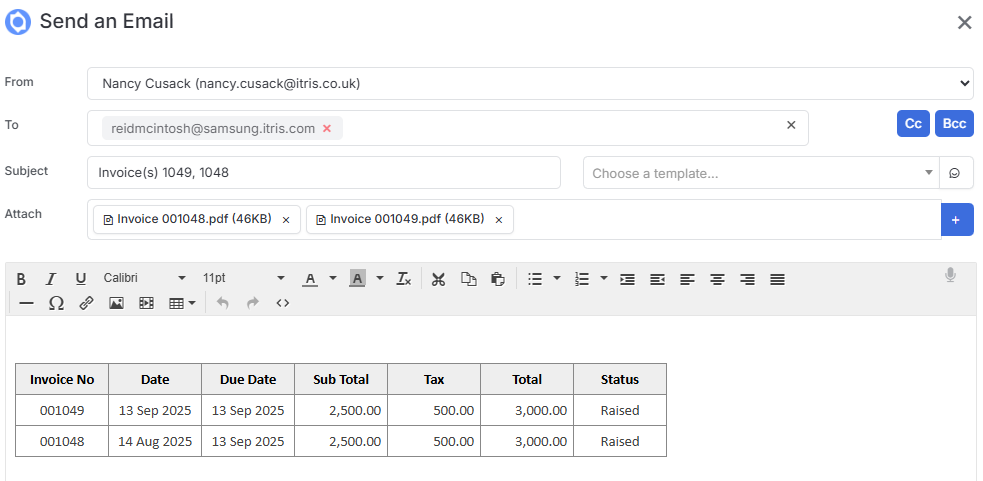
When choosing to email invoices the email body will automatically include a summary of the invoice(s) - this isn’t a template you need to worry about setting up. Note the workflow options available at the foot of the email window.
When sending emails to the same contact you can select “Email Selected Invoices”. A summary of the invoices will appear in the email body and the invoices will be attached.
Bulk Emailing Invoices
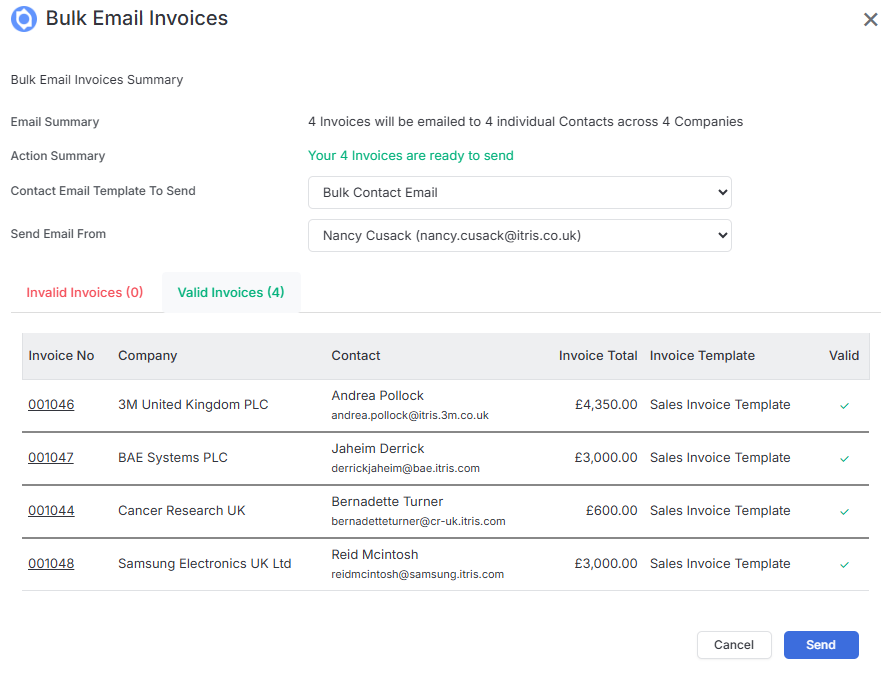
When sending emails to multiple contacts choose “Bulk Email Selected Invoices” or “Bulk Email all Listed Invoices”.
The Bulk Email Invoices Summary will show how many Invoices are valid for sending, and how many are currently invalid and require amendments before they can be sent. All invoices must be valid in order to bulk send.
Ensure you choose the correct email template as once you hit send you will not be able to edit the email.
Bulk Update
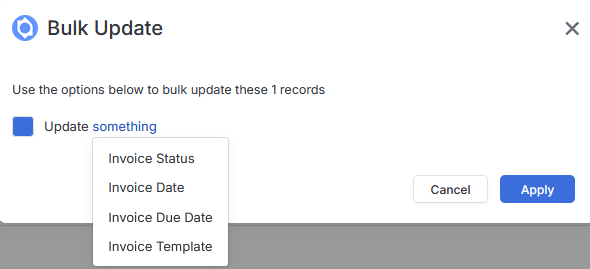
Via the Bulk Update action you are able to bulk update the Invoice Status, Date, Due Date and Template. This action is particularly useful for bulk updating invoices statues, for example when paid.
Bulk Update Custom Fields
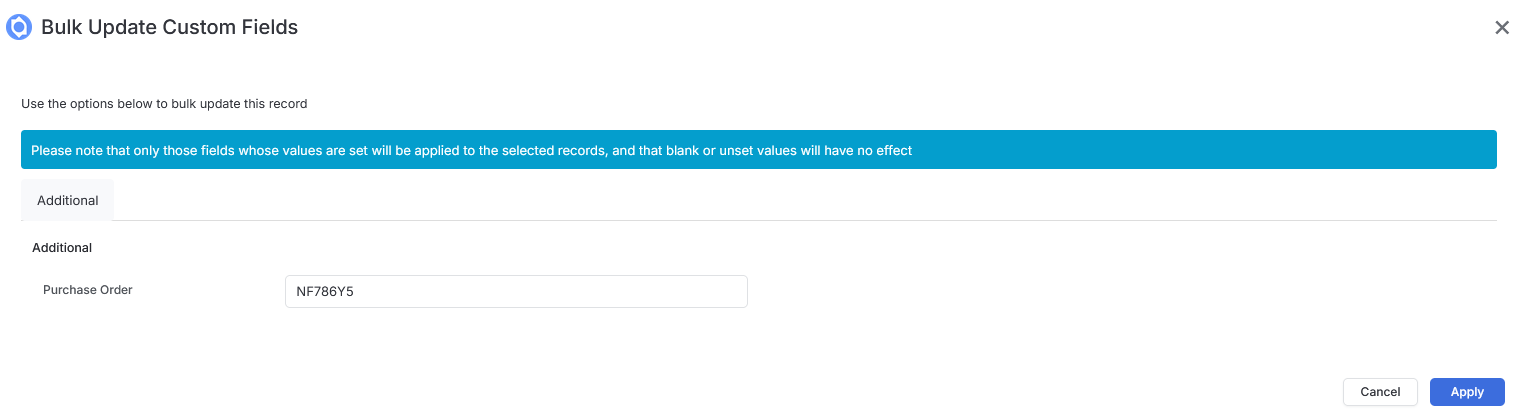
If you are using Custom Fields on your invoices you are also able to update these fields in bulk. Please note any blank or unset values will have no effect. See the article Tools & Settings | Custom Fields to find learn more.
Marking Invoices as Paid
When it’s time to mark invoices as paid, you have two convenient options:
Option 1 - Click on the checkbox(es) for the relevant invoices and use the Bulk Update workflow as detailed above.
Option 2 - Open the individual invoice, change the invoice status dropdown value to paid, and save your changes (either Save or Save & Close).