Introduction
When you present candidates to clients using consistently branded CVs, you’re not just sharing a resume—you’re showcasing your agency’s attention to detail, professionalism, and quality standards.
This branding helps differentiate your submissions from competitors and keeps your agency top-of-mind with hiring managers throughout the recruitment process.
Additionally, branded CVs allow you to control the narrative by strategically presenting candidate information in a format that highlights their strengths while maintaining candidate anonymity until the appropriate stage. This professional presentation builds trust with both clients and candidates, ultimately leading to higher placement rates and stronger long-term business relationships.
Due to itris being highly customisable, the order and name of the tabs, or the placement of record blocks referred to in this article may differ for you.
Source CVs
In this article, we will predominantly cover how to create agency CVs by applying pre-created itris agency CV templates to a candidate’s CV content (see the article Tools & Settings | Agency CV Templates for how to create templates).
However if you have an Agency CV that has been created outside of itris you can upload it direct to the candidate record as an Agency CV. This would be done via the Documents area on the candidate record > selecting the Document Type Agency CV > and uploading the CV.
CVs typically come in Microsoft Word or PDF format. For creating an Agency CV, the original format doesn’t matter because when a CV is uploaded to itris, it gets automatically parsed and broken down into individual data fields. This parsed information can then be used to generate a properly formatted agency CV regardless of the candidate’s original CV format.
Starting Points
Agency CV can be created from a number of places:
- Candidate Record
- Job Record > Longlist Search
- Job Record > Submission > Shortlist card
- Sending CV to Job Contact
If there is no original CV on the candidate record, but you have a CV on your PC you wish to use, you can still follow these starting points, see below for more details.
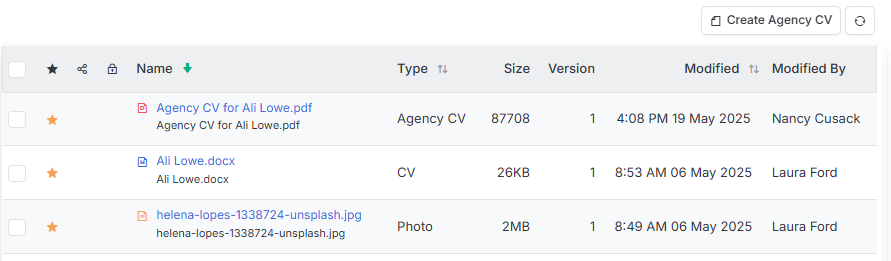
Candidate Record
Whilst on the Documents area of the Candidate record click Create Agency CV.
Job Record > Long List
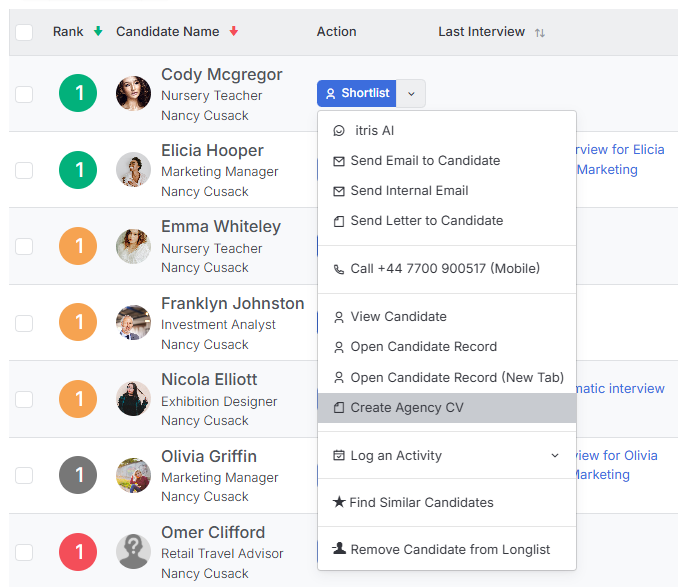
From the candidate drop down menu on a Job’s long list is the option to create an Agency CV.
Job Record > Submission > Shortlist card
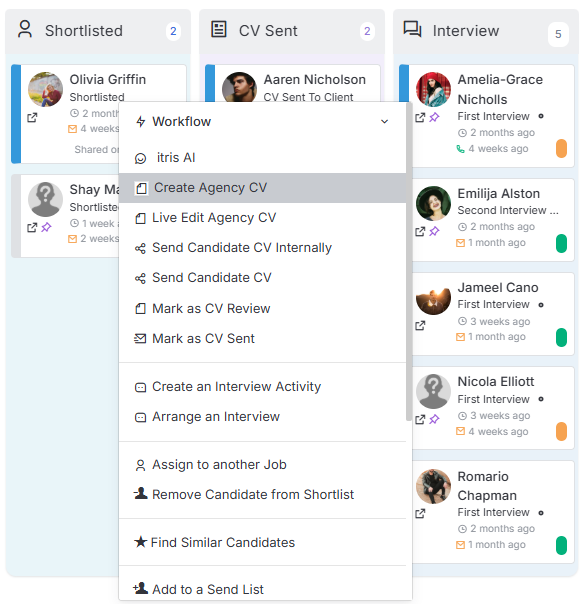
From any Shortlist card on the submission tab the drop down menu can be used to create an Agency CV for that candidate.
Sending CV to Job Contact
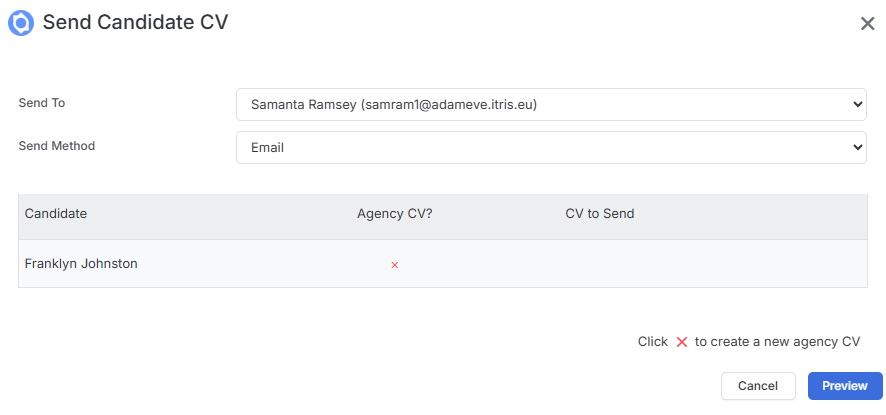
When sending a candidate to a Job Contact, if the candidate does not already have an Agency CV you can click the X to create one.
Creating an Agency CV
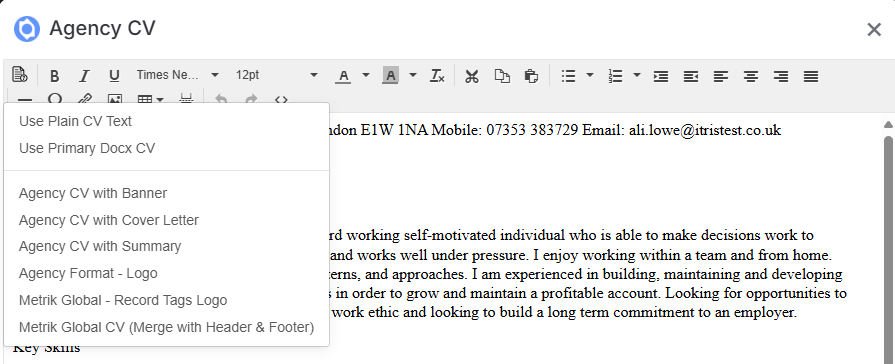
After clicking to create an Agency CV you will first be provided with a Plain text version of the CV (if one exists). If there is more than one CV this will be the latest one that has been xTracked. You then have a options via the Content Selector icon in the formatting bar, once your options is chosen click Save As to progress.
No Original CV
If there is no original CV the Agency CV form that opens will be blank. You can use the Select Docx file to select a CV saved on your PC. You can then adopt either the Plain Text or Apply Template options below.

Plain Text CV
Where the candidate does have a CV available to create an Agency CV from you will initially see a plain text version (e.g. all formatting removed). You may choose to edit this, for example removing contact details, adding formatting etc. However, please note that at this point there is no branding on this CV.
If this is a Word document you will see below how a Header & Footer can be applied to this.
Primary Docx CV
This is essentially their original CV including all the formatting. As with the Plain Text version, you may choose to edit this, for example removing contact details, adding formatting etc. However, please note that at this point there is no branding on this CV.
If this is a Word document you will see below how a Header & Footer can be applied to this.
Apply Template
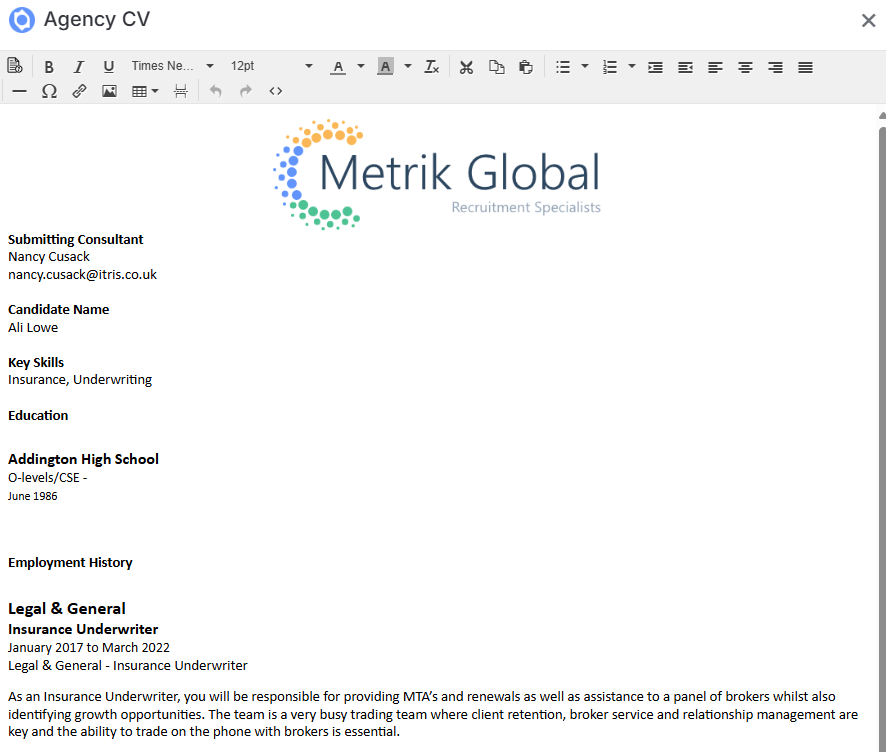
Where Templates have been created (see the article Tools & Settings | Agency CV Templates) you can select one of these. These templates can contain image/logos and Tags (merge fields) for data from the candidate record, there is even a tag for a plain text version of the CV.
Save CV As
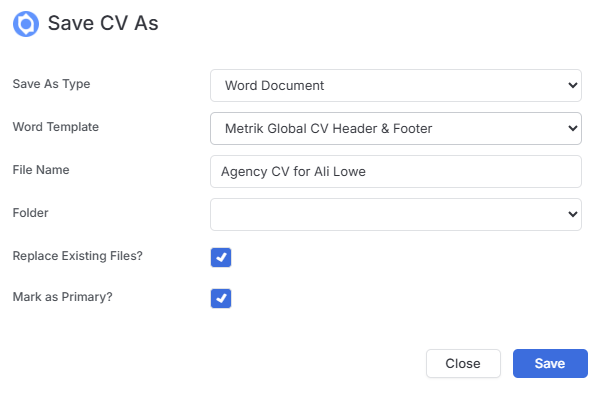
Once you have selected your option for the Agency CV and clicked Save As you can choose how to Save the Agency CV.
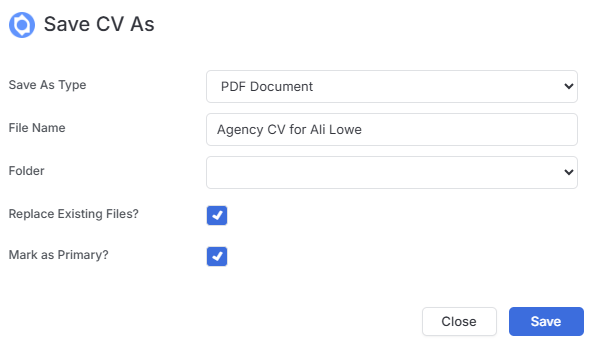
CVs can be saved in Web, PDF or Word Format, additionally you can choose the File name, whether it replaces the existing Agency CV and/or is the Primary Agency CV.
If you are choosing to Save As a Word document you can apply a Header & Footer, see below.
Once you click Save you will get a confirmation the Agency CV is created and can continue your workflow.
Applying a Header & Footer to Agency CV
This option is used when you want a header and footer on every page of the CV, rather than just a logo on the first page (which is achieved via Agency CV templates).
Since headers and footers are a Microsoft Word feature, this setting only applies to Agency CVs in Word format.
For this option you will want an Agency CV template created that doesn’t have a logo in it, as you’ll be applying this via the Header & Footer. Additionally, a Word document containing the Header & Footer will need to be added to you Document Library.
In the Save CV As window you will then be additionally be able to select which Word Template to merge with.